Thursday, June 30, 2011

A Dinosaur of a Shag Rug!


For this month's Create With Me over at Ucreate the theme was based off of the shag pillow tutorial at V&Co.  I just had to join in but I didn't want to do a pillow, I wanted a rug! 

Baby Jackson has just one measly decoration for his room, you can see it HERE.  But now he has two!


The rug is made using old t-shirts!  I love a good upcycling project!


How I did it:

I basically used the tutorial at V&Co.  The main difference was that I used a large piece of felt for my base.  I hand drew a dinosaur in the middle and let the lines and illustration guide me on where to go.  For the edges I sewed some "caveman" fabric straight onto the felt.  Super simple but also a bit time consuming.


The best part of this rug is that Baby Jack Jack loves it.  I sat him down on it and he just laughed and laughed.  It must have felt great on his fat little bum.  So worth it.

Wednesday, June 29, 2011

Father's Day Treats - Two Ways

At Church every year on Mother's Day the men do something nice for the women.  Sometimes it's flowers, or like this year, it was chocolate.  Well, the women do the same for the men on Father's Day.  This year my friend, Amy at Indulge With Me, was in charge of getting the treat together and she let me help out.  So Amy, Mary and I got together one afternoon to make these -

I used my Cricut to cut out the ties.  I used the Paper Doll Dress Up cartridge.  I selected the Prom Boy necktie and put it on the largest setting on my Cricut which is 23 1/2 inches.  The tie didn't come out to be that big but when you cut out individual pieces with the doll cartridge the sizes get a little tricky.  I can explain in more detail if you really want to know but if you have this cartridge you know what I mean.

Anyways, we cut out the ties, wrote Happy Father's Day on them and tied them to a full size candy bar.  So simple.  Just the way men like things.

 
Every year on Mother's Day and Father's Day, the children make a craft of some sort for their parents.  Our Primary Presidency (the leaders of all the children 18 mo. - 11 years) came up with this adorably clever idea.  They simply cut slits on each side of a white paper lunch sack.  The children glued on a pre cut tie and then folded over the bag to look like the colar on a white t-shirt.  Inside was a handmade card from the children and a yummy cookie.  My husband, John, and I teach the Sunbeam class (3 year old Sunday School) and John was so excited the whole time we were making these.  He made sure one was reserved for him. 

If you know John at all you know he is not easily excited about things.  All day he kept mentioning how fun these two gifts were to get.  So there you have it.  Two ways to do Father's Day Treats that daddy is sure to love.

Tuesday, June 28, 2011

Fat Free Potato Chips

This is my new favorite snack.  I crave these constantly.

And guess what??

Just 75 calories.

Yeah,  you heard me.  75 calories.  0 grams of fat.  100% delicious.


The naturalness of these chips is what makes them so good.  They are done in the microwave so anyone can make these.  So simple.  So good.  Another tasty variation is to use sweet potato instead of regular potato.

Ingredients:
  • Potato
  • Pan spray
  • Salt

Directions:

 Step 1:  Slice potato as thin as possible.

 Step 2:  Spay a large plate with pan spray and lay potato slices onto plate.  Sprinkle with salt.


Step 3:  Since all microwaves are different I can't just give you a time to cook them.  You need to play around a little until you find out what works for your microwave.  I cook mine starting at 6 minutes.  I then add minutes as I need to (usually 2 minutes at a time) according to how the potatoes look.  You know when they are ready when they start to crisp up and get a golden brown look to them like in the first picture.  Potatoes will get crunchier as they cool so color is a major factor in determining doneness.

Serve with a dip of your choice or eat alone.  Serving size is one potato.  Calorie information taken from My Fitness, calculations using My Recipe. 

Sunday, June 26, 2011

New Glory His and Hers Independence Day Outfits

Remember when I showed you last year's Independence Day dress and I told you I had big plans for this year?  Well, here it is. 

Introducing 

New Glory, His & Hers


Red, White and Blue.  Not a more beautiful combination.


Want to know what these outfits used to be???


 Grampa Pants!!

I've had these pants for what seems like forever.  I bought them at the thrift store, Saver's, in Reno.  I haven't lived there in forever so I must have been holding onto these for at least 8 years or more.  I don't know why I loved them so much.  Probably because they made my butt look awesome.  But it was time to face reality, I don't fit in them anymore and really, no mom should be wearing them.  I'm not saying I should be wearing mom jeans but pants like these are best kept in our early twenties and used for riding long boards in parking lots late at night.

So....  goodbye Old Glory.  Welcome New Glory!


 I made these outfits using patterns that I created. 

I've been loving BIG bows and HUGE pockets and thought that this dress needed to incorporate both.  Mags loved the pockets so much I caught her smuggling books to church in them.  The main body of the dress is a lightweight navy cotton.  I wanted it it be nice and cool for the hot summer.

Jackson's romper is a take on the typical Southern boy outfit.  The anchor is appliqued on.  I made some pretty big mistakes in the pattern but they were easy to fix in the end.  I wish I would have measured a little more thoroughly because it is exactly the right length.  The way this kid eats he's not going to be wearing it too much longer.  The shoulders have button closures.  Again I wanted a nice cool outfit for the hot summer.

Sweet Home Alabama! 


 Now, I don't want you to think that I plan out photo shoots where I get my kids to share an apple because it would make for a cute picture or have my daughter stare off dramatically into space for effect.  Because I don't.  In fact, you should feel sorry for me because every one in my family hates getting their picture made.  Hates it.  So I suck it up and instead of thinking of those other blogs where the cute kids smile, and laugh, twirl and pose in their new outfits mommy made them, I grab my ipod (because maybe they won't notice it's taking pictures) and start clicking away in the hopes that there is a decent one.  So you get to see Mags try and pull out her hair bow and run away from the camera.  You get to see that my kids have no interest in pictures, or putting down their breakfast. 

Sigh...

Oh well, at least they're still cute in their new outfits and ready to celebrate America!


___________________________________________________

Visit thecsiproject.com
Two years in a row!
2011 & 2012


Friday, June 24, 2011

Camp Craft Series: The Good Deed Tree

This is the last day in the Camp Craft Series.  Be sure to check out all of the crafts in the series


Sharon, the camp director wanted to have A Good Deed Tree.  She wanted something similar to THIS but more earthy.  I was able to help her out and created this tree for her.  It was so simple it took less than 15 minutes to do.


Supplies:
  • Empty burlap rice bag
  • Empty #10 can
  • Ribbon
  • Rocks
  • Tree Branches
  • Pruning shears
  • Paper leafs (I cut mine out using my Cricut)
  • Baby clothespins


TUTORIAL:


Step 1:  Gather branches.  Trim off excess leaves or smaller branches with pruning shears.

Step 2:  Cut off the top of burlap rice bag (save the zipper for another project!) and turn inside out.

Step 3:  Slide empty can into bag.

Step 4:  Place branches into can and arrage until it looks best to you.

Step 5:  Fill in empty gaps with rocks, gravel, dirt, etc.

Step 6:  Wrap ribbon tightly around tree and burlap.  This will also help keep it secure.

Step 7:  Have the leafs and clothespins available for the girls to write the good deeds that they see others do.
Do you see the rocks??  They fill in the gaps and add weight to the can.


The girls were able to notice the good things that others did and were also able to give eachother credit for those good things.  Win - win! 

Thursday, June 23, 2011

Camp Craft Series: Journals

For camp each year the leaders like the girls to have journals.  Natalie made a basic one (seen below) as an example and let the girls have free rein.  They really made some cute journals.  I really like these journals and use ones like this that I've made in the past as inspiration journals for my clothing design inspirations.


We bought our notebooks online at ebay for 10 cents less than you would pay at the cheapest store.  I cut out the decorative scrapbook paper cut-out using my Cricut.


The girls made these at registration the first day.
Step 1:  Get Journal, camp theme, scrapbook paper and 2 pieces of plain paper.

Step 2:  Cut out plain paper to fit journal cover.

Step 3:  Glue covers, scrapbook paper and camp theme to journal.

Step 4:  Get a set of labels and place wherever you would like inside your journal.

Step 5:  Write in journal often.  If you want you can add decoration to journal during craft time.


We're nearing the end of the Camp Craft Series.  If you missed them, be sure to check out


Tomorrow's Tutorial

The Good Deed Tree

Wednesday, June 22, 2011

Camp Craft Series: Headbands with Interchangable Bows

We wanted the girls to feel as beautiful on the outside as they are on the inside so we decided to make hair accessories.  These are super popular right now in stores, plus, the young women have been begging to learn how to make them.

 I showed each girl how to make the loop for the headband but I left the bow making mostly up to them.  If I could do it over and if I had the man power to watch over the rest of the crafts I would have sat down and done just bows and flovers with the girls.  There are so many ways to make these that I'm not going to do a tutorial for every kind of flower I know how to make but there are excellent tutorials HERE and HERE at my friend Elizabeth's blog, The Moonlit Nest, and also a great one HERE at her friend's blog Sewing in No Man's Land.  Those should keep you busy for a while.

As you can see from these pictures, the girls did great on their own!  SO gorgeous!


Supplies:

We had on hand the following items.  There was lots left over but hopefully the Young Women can find something to do with all of it.  If not I sure know I can!  Ha ha. 
  • Clear plastic gems (pack of 1,500 in assorted sizes from Hobby Lobby)
  • Buttons (miscellaneous button pack $5.99 at Joann's)
  • Plastic pearls (2 packs at 350 pearls per pack from Hobby Lobby)
  • Felt in various colors
  • Tule in various colors
  • Some sort of poly-satin in various colors
  • Metal headbands (Purchased from Korean seller on Ebay, excellent price, less than .40 cents each.
  • Skinny metal aligator clips (found at Sally's Beauty supply in packs of 100)
  • Lots and lots of ribbon (found in ribbon remnant packs you can read more about these packs HERE at my old money saving blog)


TUTORIAL:


You will need one head band, a small piece of ribbon, and clips.
Step 1:  Attach ribbon to the inside of headband using hot glue.

Step 2:  Wrap ribbon tightly around headband once and secure with more hot glue.

Step 3:  Wrap ribbon around one more time but leave a small loop (just enough to slide a clip through.  Glue ribbon end to inside of headband and trim off excess ribbon.
See the loop?


Now you can just slip in any clip and hair bow that you'd like.  The possibilities are endless.


If you missed them, make sure you check out the other crafts in the series


A be sure to come back for the last two days in the series

Thursday - Journals

Friday - Good Deed Tree


Tuesday, June 21, 2011

Camp Craft Series: Personalized Washer Necklaces

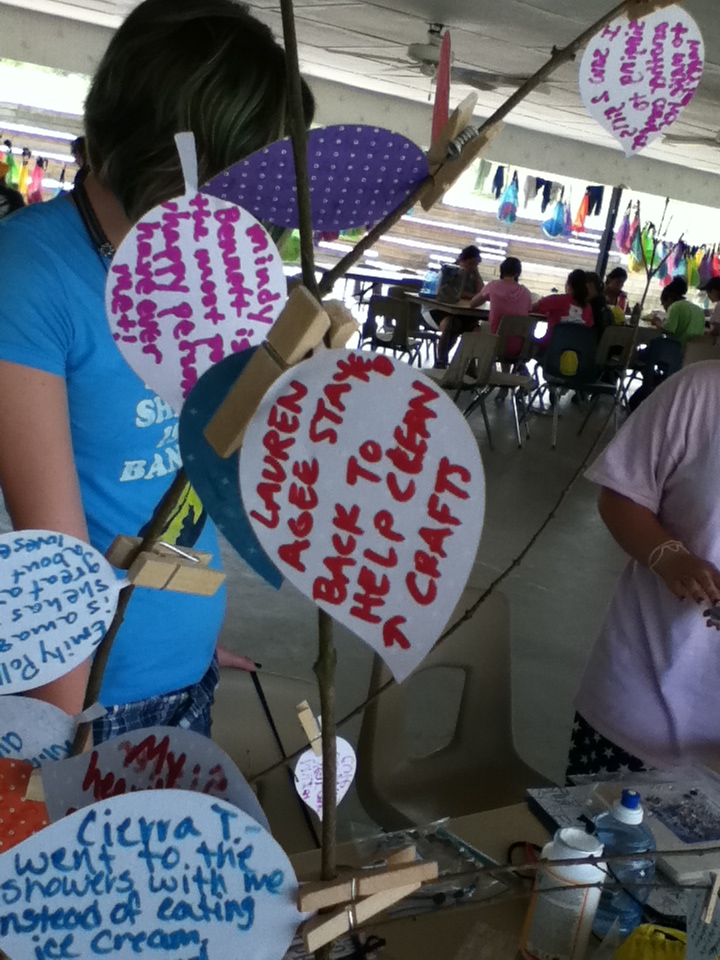
If you're wondering what the most popular craft we did at girls camp this year, wonder no more.  This was it.  We bought extra washers and we ran out.  I hated to tell the girls that there were no more.  If we ever do this craft again I'm buying at least twice the amout we need, if not more.  Sharon, the camp director, came up with this craft and I'm so glad she did, it was a hit!


All of these pictures are of necklaces the girls created.  Including the ones above.  I loved to see what the girls wanted to stamp into them and the beautiful prints that they chose.  Some even found unique and interesting ways to tie them.  I loved them all.


TUTORIAL:

Supplies:
  • Stamping set (found HERE at Harbor Freight)
  • Hammer
  • Small washer
  • Large washer
  • Scrap of paper
  • Mod Podge
  • Paint or permanent marker
  • Jewelry cord*


*We purchased multi-colored packs of cord from Joann's jewelry section for about $8 a pack.  I'm unable to locate a link to the exact item but they carry a nice variety of cording and you should be able to find what you need in the store. 


Step 1:  Stamp your personalized words onto small washer.  Hold the stamp steady and hammer into washer.

Step 2: Fill in stamped image with paint or permanent marker.  This will help image stand out more.  Wipe away excess paint or ink.  A baby wipe works best to do this.

Step 3:  Take large washer and trace onto a piece of paper.  Cut out the circle.

Step 4: Apply a thin, even layer of Mod Podge to one side of large washer.

Step 5:  Place paper cut out onto large washer and smooth out.  Apply an even coat of Mod Podge over the top.  Let dry.

Step 6:  Tie the whole thing together with cord or ribbon.


Simple right!?!  And just to show you how clever, creative and talented these girls are, check out this stunning washer.  This was done by wrapping the embroidery floss from the friendship bracelets around the washer.  To secure it they tied the ends in knots on the back side.  All of these girls are brilliant.


If you missed them, be sure to check out the other tutorials in the series


Be sure to come back tomorrow for

Headbands with Interchangeable Flowers
Related Posts Plugin for WordPress, Blogger...