Tuesday, July 31, 2012

Gold Chevron Tote {tutorial}

Do you have one of those friends that you love to death but you never get to see them because you're both so busy?  Mine is Sabrina.  It just seems like the stars never align for us.  But this past Friday they did align and we spent the whole day crafting, and eating, and laughing and crying.  Love her.

Well, Sabrina has this habit of spoiling me and my children and one of the many things she brought were some fun neon canvas totes.  After a sewing fail, I got burned out and decided to switch to paint.  And that my dears is the story of how the Gold Chevron Tote was born. 


Now you may remember I tried painting a similar-ish type thing with my old door mat.  I didn't measure a dang thing and though it turned out okay, I vowed to measure things the next time so the pattern wasn't so off.

You can read about the herringbone mat HERE.

I vowed to change but I had to be true to myself and let's face it, I AM LAZY.  I'm also not a perfectionist.  So instead of getting out a ruler I devised this method -


First I put regular width masking tape town the middle and in a cross section.  I used these as my guides.  I then added chevrons with the wide masking tape.  At this point I then removed the regular masking tape by peeling it away and then cutting it where the two tapes overlapped.

 
I then filled in the spaces that were left with more wide masking tape.  This is where I should have pulled out my ruler because some of them weren't spaced out exactly perfect but "Meh.  What ya gonna' do now?"  It's a good thing I'm not a perfectionist.  Sorry to all my readers who are perfectionists, I know you're cringing in horror right now.


I then dabbed on some gold craft paint {similar to this here}and called it a day.  The whole project took maybe 5-10 minutes to complete and I now have a new great little tote that I have been carrying around all weekend.  You know me, if it's fashionable and functional I'm a happy girl!


If you're looking to find canvas bags I've found a bunch on Amazon in neon and plain.  On Amazon they sell them as singles or in packs.  I'm thinking I may just buy a pack of colorful bright canvas totes and make myself some cute grocery bags.  You need to look stylish while grocery shopping, right? 

Thanks Sabrina for the fun new tote!


Visit thecsiproject.com

Sunday, July 29, 2012

I hope she... {thoughts on Skirting the Issue}

This month, Project Run & Play has been hosting an event asking people to make skirts to be delivered to girls in the foster system.  The skirt below is my donation.  It's a purple lined skirt with a sheer sparkly purple overlay.  The wrinkly picture does it no justice.  But my daughter calls it the princess dress and begs me to let her keep it, so I know some other little girl will love it too.

I keep thinking about that little girl.  How is this helping her?  "Sorry your parents aren't there and your life is so hard.  Here's a skirt."  I wish I could do more for her.  I wish I could take her into my home and make her part of my family.  I wish I could love her and protect her forever.  But I can't.  I'm not in a place in life where that is possible.  I wish I could take in all the children of the world but I can't do that either.
  

While I can't do these things, I can do this one thing.

So with this skirt I hope the message is sent to this precious little girl that she is loved.  That someone is thinking of her.  So I give this little skirt to you and send with it all my hopes for you.

I hope she...

feels like a princess,
is strong and confident,
stands up for what is right,
wears a smile.

I hope she...

feels loved,
loves others,
is kind,
works hard.

I hope she...

finds a place to call home,
is safe,
is happy,
feels peace.

I hope she...

can forgive,
can move forward,
can  build her future
and be the best she can be.

I hope she...

knows she's beautiful,
knows she's special,
knows she's worthy,
she's good enough.

I hope she...

knows that she's not alone.


Tuesday, July 24, 2012

Rubber Dipped Vases {Tutorial}

Are you guys ready for the simplest project ever?

Today I'm going to tell you how to make rubber dipped vases. 


I know it sounds weird.  Rubber?  Well... yeah.  From pictures, it looks like it could be dipped in paint but it's actually rubber.  The rubber gives a unique texture, feel and security.  It won't chip off, fade or crack like paint would and would also repel moisture.  Plus, it's just cool to work with new materials.


My dear friend Mary was cleaning house and gave me the teeny little vases and the rubber so I thought it was fitting to put them together.  I used them as part of my Ombre Ambiance table setting {though technically they aren't ombre} and I liked how they added to the table without overwhelming it. 

So here's how to make your own rubber dipped vases:

SUPPLIES:

- Vases
- Disposable bowl or cup
- Stir stick or plastic spoon

Plasti-Dip Create Your Color
First, let me explain what Plasti Dip is.  The men in your life have probably already heard of it.  It's rubber coating that is used for coating the handles of tools.  You can purchase it at most hardware stores in the paint section.  It comes in a mini paint can and costs between $10 - $20 a can though you certainly may find it for less.  A little goes a long way.  The most common color that it comes in is black {that's all they had at Lowe's.} but they have a new product called Create Your Color which Mary found here on Amazon.  The rubber in the can came clear and I simply mixed the supplied colors until I got the color I wanted.  The rubber is liquid in the can but firms up once dried.  I still have a lot of rubber left and can't wait to get started on more projects.   {P.S. this post isn't sponsored by Plasti Dip I just thought I would keep you informed on the product.}


TUTORIAL:

Step 1:  In a well ventilated area, open your can of Plasti Dip and pour desired amount into bowl.  Mix in colors until you reach your desired color.

Step 2:  Dip vase bottom into rubber mixture slowly according to instructions on can.

Step 3:  Allow any extra rubber to drip off and let dry.  Repeat process if you want additional coats.


I really love the charm these teeny glass vases now have.

Now it's time to scour the house for more things that should be rubberized!  Can you imagine the possibilities?


Monday, July 23, 2012

Ombre Ambiance

So if you've been following along these past few weeks you may be saying to yourself, "Where is Alicia's post about voting for So You Think You're Crafty this week?"

Well, I'm here to tell you... sad day... it's over.
Done-zo. Ka-putz.  I was voted off the island.  Whatever you call it, I was eliminated.

I'm left scratching my head on where I went so wrong this week.  I had no idea I had such a fail on my hands.  I really loved my project but to each her own I guess.  My mom suspects that it could be that the ombre dying of the table cloth didn't translate as well on camera.  It's entirely possible.  I guess I just have to chalk it up to the fact that I had fierce competition and someone had to go last week so why not me?  I'm sad to leave the competition and had a great time.  I'll enjoy following along and cheering on my fellow competitors.

The theme was ombre so I gussied up some of the things that were just blah and tried to give them a little wow factor.  Here's my entry but come back tomorrow and the next day for tutorials on the paint technique I used as well as the rubber dipped vases.

Using items I already had at home, I created a nice little ombre table scape.  Except for the bowls & forks, I made everything you see here, including the table.  But we can just focus on the ombre.  For the ombre theme I dyed some vintage fabric that I sewed into a table cloth and accented with some rubber dipped mini vases.  I spray painted a Chinese lantern left over from my wedding in two tones of blue and also painted the handles of my salad tongs to match. 


I used several shades of blue to create a nice, tranquil vibe.  Perfect for enjoying my beautiful backyard.

Thank you to all who supported me in this competition and continue to support me through this blog.  You guys make me feel like a winner!  {I fully recognize the cheesiness of that last statement but it's true.}

The good news is, now that I'm out I have lots more time to dedicate to The Creative Vault and re-opening my shop for the first time in 3 years.  That should be fun.  

Oh yeah... and I may have a fun Harry Potter Week in store too so stay tuned!

Sunday, July 22, 2012

Family History Presentation

This past weekend I was asked to present at a regional family history conference. It was a lot of fun. I promised the attendees I would link to the presentation through here so they could look over it again.

Follow the link to view.

Teaching Our Children About Family History

I'd love to share what I have with you my readers as well, so I'm putting together a round up of all of the great ideas I found. In the meantime, feel free to check out the presention but come back later this week for a blog version. It's stuff every family could benefit from.

Hope you had a great weekend!

Tuesday, July 17, 2012

Neon & Navy Pool Bags

 Here is my project for SoYou Think You're Crafty's last weeks Summer Bounty theme.  I love these bags especially since they have been so useful at the pool.  I had some tough competition though and was nearly eliminated!  Let's hope that never happens again!  This weeks theme is Ombre.  So head on over and vote for your favorite.  Hope it's mine!

__________________________________________________________


Neon.  Navy.  Stripes.  Chevron.

The only thing hotter this summer is the weather!

Oh wait for it... all these pool bags only cost $2.  Now that's a HOT deal!


I picked up a navy striped canvas shower curtain from the thrift store for $2 and got to work on making essential pool bags for summer.  The result was 4 bags and a tag to keep all of our pool gear in check. All edges are surged for a finished look and hot pink thread accents the bags throughout.  With accents of neon green and shabby chic hot pink chevrons, simple bags become fun and fabulous!


Duffle:  A repurposed hot pink zipper closes the pleated bag.  On a strap are decorative chevron stitches in hot pink and 3 large chevrons line the front.

Tag:  A simple fabric tag tied with jute, hangs with a clear vinyl cover to keep our pool card within easy reach as we check in.

Clutch:  This clutch is closed using the elastic that comes when you buy a new pair of kids shoes and a bright green large button.

Large Duffle:  A large round bottomed bag.  Using the existing grommets from the shower curtain I strung through some neon green ribbon to use as the bag closure.  The bag also has a shoulder strap for easy carrying which is accented with hot pink chevron stitches all the way down.

Wet Suit Bag:  This bag is made with a piece of table cloth vinyl and uses a thinner version of the neon green ribbon as its drawstring enclosure.


While at the pool taking photos these fun bags had many admirers and offers to purchase the bags but no sale.  These babies are all mine and I know they're going to get lots of use this summer!  
It's nice when useful and fashionable meet!
  
Now...  who wants to go swimming?!?!

Friday, July 13, 2012

Bubble Ruffle Tu-Tu Tutorial

Last month I shared this tutorial over at 
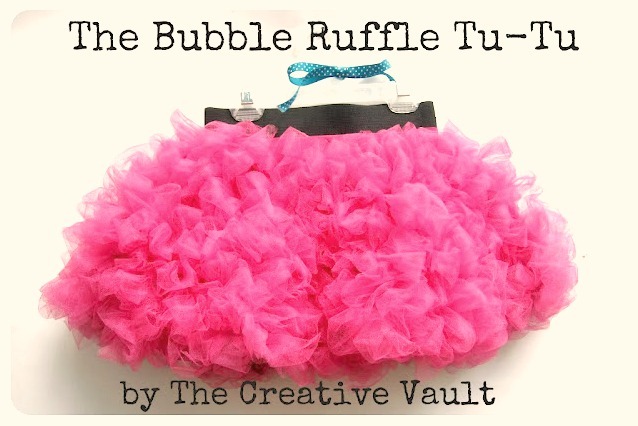
UCreate.  It was so much fun being over there and it was so nice to hear all of the bubble ruffle tu-tu love.  When I created the bubble ruffle tu-tu I never expected it to get the reaction that it did!  I thought it was time I brought it home so here it is -


This is a little skirt that you can make to look very sophisticated or super fun.  It has everything a girl needs - fluffy, frilly, twirly, sassy, chic, you name it!  I can't help but think of how amazing bubble ruffles in white chiffon would look on the bottom of a wedding dress.  There are just so many possibilities.  The best part?  ANYONE CAN MAKE THIS SKIRT.

This skirt looks like it might be complicated and requires a lot of sewing skill but it doesn't.  Even a beginner can do this.  You technically don't even need to know how to sew a straight line.  And because the bubble ruffles are so fluffy it easily will hide any mistakes you might make.


You can complete this skirt in 4 basic steps.


I know, you're thinking, "That was technically only 3 steps."  But trust me, step #4 is the most important and most fun part.


Let's get started.  Here's what you'll need.


For the black skirt I cut up an older lady style nightgown to make the skirt.  The skirt base was made from a slip and the ruffles were made from a nylon chiffon.  Neither of which needed to be hemmed.  For the pink skirt I used quilters cotton and tulle.  If you use cotton like this you will need to hem your skirt to keep it from fraying.  Do your best to pick colors that match each other so it will all flow together.

For my 4 year old I used 1 yard of cotton and 4+ yards of tulle.  You of course would need to determine the amount you'd need for the size you create but you can use this as a guide.

You can purchase 2 inch wide black elastic HERE.


STEP 1
Make a modified circle skirt.


To create your circle skirt pattern, measure A & B.  To create the curve you can tie a string to a pencil and hold it the length that you need.  Simply move it up and down on your paper to create the nice curve.

If you look closely at the picture above you can see that the fabric is folded in half on the bottom and then folded over again and there is a fold on the left hand side.  When you fold it this way you will cut out one continuous circle.


Now that you have your nice circle you need to modify it a bit.  As a true circle skirt it is too bulky with the ruffles, but using this modification you cut down on the bulk while still keeping the twirl factor alive.

Cut a pie shape out of the skirt like the picture above shows. You don't need to get too technical about how much you cut out.  Like I said, this is a very forgiving skirt.  Sew up that now open seam.

If you are using a material that will fray, now is the time to secure those edges so they look nice and clean.  For mine I serged the edges then folded it under and top stitched, but you can use any number of hemming techniques you are familiar with.  If you're using a material that won't fray you don't need to hem the skirt.


STEP 2
Sew Bubble Ruffles All Over Skirt


First things first - cut your tulle in 2-3 inch wide strips.  It's ok if its not perfect.


Take a strip of tulle, bunch it up a little and stitch onto your skirt.  Then about 2 inches later, bunch up your fabric again and stitch again.  Repeat this step in a random pattern until you've covered the entire skirt.


This is what it looks like after one strip of tulle has been sewn on.  As you can see you'll need a lot of tulle.


Although you'll be sewing in a random pattern there is no need to sew and stop, sew and stop. If you look at the back of my skirt you can see that I just made one continuous line.


A faster way to make the ruffles is to lay your tulle strip in a zig zag pattern and sew down the middle.  It works faster but you really have to make sure you fill in all the spaces next to it to get that full bubble look.

After you make a few bubble ruffles you'll get in the swing of things and the work will go much faster.

Leave about an inch or two at the waist free of ruffles so you can attach your elastic.


STEP 3
Attach Elastic


When you sew the elastic together and then stitch down the edges it creates a nice flat round of elastic and a finished look.  When you attach they elastic you'll need to make sure you stretch out the elastic to line up smoothly with the waistband as you sew to ensure it has the give it needs to fit over your little girls tum.


Step 4
Rock it!


The best part about creating is creating smiles!


I hope you create a bubble ruffle tu-tu for the girls in your life.  If you do be sure to stop by The Creative Vault and show me.  I'd love to see it!

Thank you Kari for noticing my little tu-tu and inviting me here today.  It is such an honor and a ton of fun!  

Thank you!  Thank you!  Thank you!

Monday, July 9, 2012

DIY Play Parachute

It's another week of voting over at So You Think You're Crafty.  The theme this week is Summer Bounty.  Feel free to head on over and vote for your favorite!

In the mean time - here's my project from last week.

A  PARACHUTE!!!!!

Do you remember how awesome these things are?


It's pretty common knowledge that the two best days in Elementary School were:

1.  Pizza Friday's.
2.  When the teacher pulled out the parachute.


So let's time warp back to the good ol' days with a little basic math...


That's right... 1+1= 1 super fun new 7 foot wide parachute to play with anytime we want!  No more waiting for Presidential Physical Fitness Day to parachute to our hearts content!


The kids think it's mom's best repurposed project ever. 


And THAT is how fun is born.


Thursday, July 5, 2012

Craft Fail: How not to dye a paper lantern

I had this nice paper lantern left over from our wedding.  Over the years, it had yellowed and wasn't so nice. Of course being the DIY genius that I am I knew just what to do!


I decided that I should dye it to update its look and breathe new life into it!  Perfect!
I prepared some fabric dye and while holding the lantern over a bowl and slowly and carefully began to pour the dye over the lantern.  It worked!  It created a beautiful shade of grey which would go so well in my living room.


Okay, now here's the part where the word genius beings to get air quotes.  SO...  being the "DIY genius" that I am I took the lantern outside and opened it up so it could dry quickly and evenly.  Opening it up tore that wet delicate tissue and the entire lantern exploded {literally} onto a mess of little wire coils.  It was like opening up a can of trick peanuts and having springy snakes pop in your face.  

There may have been screaming.


And that my friends is How NOT to Dye a Paper Lantern.


Monday, July 2, 2012

Quilted Stationary


Today starts a new week of voting at So You Think You're Crafty.  The theme this week is rpurposed crafts.  So head on over and vote for yours truly {or whichever you like best}.  I can't tell which is mine just know that it's awesome.  Haha! 

Last weeks theme for the competition was scraps so I dug into my scrap hoard and came up with some

Quilted Stationary!

I really love to sew on paper and fabric gives a quality and texture that even the cutest scrapbook paper paper can't.  Before sewing, I secured the fabric to the paper with a gule stick so really this can be a no sew project as well.


Quilt Block Card:  This was an extra quilt block that never got used so I stitched it to a square card.  For the envelope I attached some of the leftover fabric from the block to the inside.  It's complimentary to the card and adds a nice little surprise.


Nautical/Americana:  For these I dug into my fabric, notions and paper scrap bins as well as the recycle.  The anchor card design is made from a fabric background with a fabric anchor appliqued with gold thread.  The flag card is a combination of fabric, red ribbon, white trim and a paper star.  The "freedom" card uses a combination of fabric, trim, paper and even uses the red plastic cover that they use to cover the tray of Cuties oranges at the grocery store.


Bright & Bold Birthday: For the balloon cards I used some black and white gingham fabric and attached it to bright cards by playing around with the different fun and decorative stitches on my machine with hot pink thread.  I then cut out a stencil in vinyl and painted a neon balloon on each one.  For the bunting cards I made teeny tiny flags and attached the tops using a straight stitch and added a birthday greeting.


So there you have it.  A fun and useful way to use up those scraps you've been hoarding!

Sunday, July 1, 2012

Happy Canada Day!


Happy Canada Day to all my north border buddies!


Click here for my Canadian Cards post


In case you didn't know, I'm married to a Cannuck, born and raised in chilly Winnipeg, Manitoba.

He says funny things like "past-a" (pasta) and "garberator" (garbage disposal) but never "eh".  Go figure.

But he does know how to eat like a Canadian! To celebrate Johnny Boy's Canadian roots I think we'll be dining on pierogies and sausage and I may try making Nanaimo bars for the first time but if I get lazy we'll just eat Fruit & Nut bars and Smarties for desert.


Have a good one, my Canadian friends!


Related Posts Plugin for WordPress, Blogger...