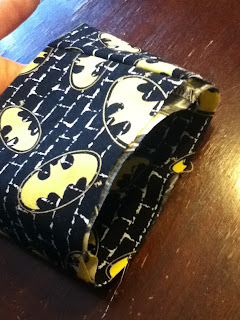
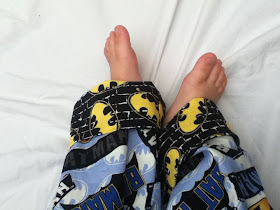
Today I show you how to make single seam cuffed pajama pants. Y'all, these are so easy and you can make them in any size or style you want. You will not find an easier pants tutorial.
Most pants you see will have an inseam and and outer seam that runs down the sides of the pants. One seam pants have just an inner seam which means less work, more comfort. This one seam technique is perfect for comfy pj's and lounge pants.
You can make these in any size, adult to kids, and once you have your pattern it takes less than 30 minutes to put it together. Great for gifts for the upcoming holidays. {Yikes! Did I just say it was almost Christmas!?!}
I also wanted to highlight The Ribbon Retreats Licensed Fabric and how great it is for boys. What little man doesn't imagine himself as Batman or Superman? The fabric is awesome enough for boys to want to wear and it gives us an excuse to craft for the guys in our life because let's face it, crafting for them can be so hard! There is also licensed fabric for girls too so be sure to check it out.
Let's get started!
Supplies:
- Main Fabric, Batman Blue Logo
- Coordinating Fabric, Batman Black Brick
- Thread
- Pants Pattern (see below)
Step 1: Create your pattern.
Lay a pair of pants onto craft paper. I buy my paper at the dollar store but you can also use the back of wrapping paper.
Trace your pants by adding half an inch to the sides. Add about an inch and a half to the top and 1-2 inches to the hem. You'll see that I made the waist and the hem line as straight as possible.
You can make adjustments according to how your starter pants fit your child. I wanted my pants to be looser than the jeans I measured from so I added a little room.
For the cuff you will mark 1-2 inches above the original hem.
Now you have two pattern pieces - a pant leg and a cuff.
Step 2: Cut out your pieces.
Lay your pant pattern on the fold of your main fabric. Cut 2.
For the cuff, fold your coordinating fabric horizontally and then once over vertically (see photo below). Lay your pattern piece on top, lining it up where the folds are and cut 2.
You should now have a total of 4 pieces.
Step 3: Lay the pants right side together and stitch the sections indicated in the picture.
{Don't let the different fabric throw you off. I just forgot to take a picture of this step in the Batman fabric. Sorry.}
Step 4: Keeping right sides together open the pants up and stitch the entire curve of the inseam.
If you don't want a cuff to your pants you're basically done. After this step you would just need to add an elastic casing and hem the bottom. If you're wanting a cuff, read on...
Step 5: Prepare the cuff.
Sew the short sides of the cuff together, right sides together.
Fold the cuff in half with the seam on the inside.
Attach the cuff to the outside of the pant (while they are still inside out) and stitch. When you attach the cuff this way the raw or serged edge will be on the outside of the pant. When you roll up the cuff you won't see it at all. I like it this way because it creates a smoother inside and is more comfortable but if you'd rather the edge be on the inside of the pant than you would just attach in the same way with the pants right side out.
Step 6: Create a casing for the elastic.
Fold over the waistband and stitch, leaving about a one inch opening. Pull your elastic through and stitch it together. Sew the opening closed.
I find that the best way to sew the elastic together is to lay one piece on top of the other and stitch together.
Step 7: {Optional}
The cuff should stay nicely when you flip it up but if you wish you can tack it in place with a few hand stitches on the side. I didn't do this to mine.
See how easy they are to make? You'll have a dozen done before you know it.
If you make these jams I'd love to see a picture!
{This tutorial was originally posted at The Ribbon Retreat be sure to stop by and check out their awesome blog and shop.}


super cute and comfy - I think my boys will be getting new pj pants for Christmas ;o)
ReplyDeletewow, so fun! I love making Pjs....Thanks for linking up to tasteful tuesdays at naptime creations.... hope to see you back next week :o)
ReplyDeleteThis would be perfect for our Christmas p.j.'s Thanks!
ReplyDeleteThis comment has been removed by the author.
ReplyDeleteSo, learned that if you use pants with an elastic waist you should add to the waist or they will be too small. Whoops! Now figuring out a way to fix them lol At least I tried them on him before doing the elastic and hem. Everything else went perfect for me! Thanks for the tutorial! :)
ReplyDeleteI can't wait to make these for my girls and my niece and nephew. They will love them.
ReplyDeletebuy wedding nightwear online uk - Buy wedding nightwear for women at best price in uk from glamournightwear! Choose from a wide range of bridal night dresses like night dress for honeymoon, gowns, sexy lingerie sets etc.
ReplyDeletecotton pajama pants womens
ReplyDeleteCotton pajama pants womens - Shop our collection of soft and stylish cotton pajama pants for women. Made for comfort, perfect for lounging or sleeping.
To Get More Information - Primepetgifts.com
Creating your own pajama pants sounds like such a fun and rewarding DIY hobby! Beginners as well can easily create something comfy and stylish with a straightforward one-seam pattern. When it comes to cozy sleepwear, the best pajama sets for women in Pakistan offer both softness and breathability for a perfect night's sleep. Whether you love classic patterns or fun, bold prints, making your own allows you to pick fabrics that suit your style. Have you ever tried sewing your own loungewear? It’s a great way to get creative while ensuring maximum comfort at home!
ReplyDeleteThanks for sharing this! I’ve heard so much about the benefits of girls nightwear do you have any favorite brands or styles you recommend? I’d love some suggestions.
ReplyDelete