Tuesday, September 25, 2012

The Marguerite Ribbon Tied Dress {Tutorial}

I've been kind of MIA lately haven't I?  How 'bout I make it up to you with a new dress tutorial?? 


Am I forgiven?


I wish the picture quality was better but all I had to work with was my iPod.  So please push past the overexposed parts to see the cuteness which is this dress.  And the fabric... that's my favorite part!  So pretty!
 

 The dress has ribbon straps that are fed through button holes in the back and then tied into a pretty bow. 
 
 
I originally posted this tutorial over at The Ribbon Retreat.
The fabric is from the new Marguerite line by Cynthia Walker for Riley Blake.  It's so feminine and gorgeous.


A simple dress with a lot of sweetness and it's easy to make too!


Let's get started.  Here's what you'll need:


Supplies:
 
For size 5-6T I used...
 
-  1 1/2 yards Marguerite Red Main
-  1/2 yard white muslin
-  1/4 yard Marguerite Blue Dot
-  Bodice pattern {see below}


Step 1:  Create pattern pieces.


Trace a shirt onto paper as you see above {I guess I can't list digital drawing as one of my special skills.  I hope you can still get the gist of it. You'll of course make your lines much more straight than you see here}.  You will want to add at least 1/4 inch seam allowance.  This is your front piece.


For the back piece you will cut out a replica of the front except for this piece you will mark approx. 1 1/2 inches in on each side {This measurement may vary depending on the size of the dress.  Just go with what looks right}.  From that mark you will then draw a curved line to the top of the armpit.


You'll now have two pattern pieces.  A front bodice piece and a back bodice piece.


Step 2:  Cut out your pieces.
 
You will need the following to complete your dress.
 
- 1 front piece out of main fabric
- 1 front piece out of muslin
- 1 back piece out of main fabric
- 1 back piece out of muslin
- 1 rectangle for the skirt that is approx 2x's the size of your waist out of main fabric
- 1 rectangle the width of your main skirt by about 6 inches out of accent fabric
- 2, 1 yard pieces of ribbon


Step 3:  Sew together bodice.


Take the two front pieces and lay them right sides together.  Between the layers pin the ribbon on the inside approx 1/4 inch from the sides of the top.  Stitch where you see the blue line.

Now take the two back pieces and place them together, right sides facing, and stitch just the same as above.  *Note:  you will NOT place ribbon between the back pieces.


Trim the pieces.  Cut off excess ribbon.  Cut the corners off.  Cut slits at the curves to so the curves will lay flat.


Now, open the back and front piece and pin together, right sides facing, like in the photo above.  Sew up the sides.


Flip bodice out and iron flat.


Top stitch around the top of the bodice.


On the back piece, sew two button holes spaced evenly apart.

You are now done with the bodice.  It's easy peasy from here.  You're almost done!


Step 4:  Sew skirt.
 
 
Fold the accent fabric in half so that the long rectangle is about 3 inches wide.  Sew accent fabric to pain piece.  Sew up side seams until you get one large tube.  This is your skirt.


At the top of the skirt use a ruffle foot or setting on your machine to ruffle or gather the top of the skirt.


Step 5:  Attach the pieces.


Right sides together, pin your skirt top to the open bottom of the bodice.  Stitch together.


Top stitch the seam by the hem on the bottom of the skirt.


Step 6:  Trim up your ribbon.


Try the dress on and slip the ribbon over the shoulders and through the button holes.  Tie a bow and trim them to your desired length.  Use fray check to secure the fibers on the ends so it will not fray.


Step 7:  Enjoy watching your sweetie pie in her new beautiful dress!
 
 
If you make the dress be sure to stop by and show me a picture of your darling and her new dress!


P.S.  I thought I should mention that I didn't win the Ultimate Room Makeover.  Super bummer.  But I did want to say how much I appreciated all of your support and love.  I have the best readers and really appreciate you.  So even though I don't get an awesome room makeover I still feel blessed to have y'all, so thank you!
 
______________________
 

Sunday, September 9, 2012

One Seam Pajama Pants Tutorial

I have a really fun tutorial for you today but I just have one order of business before I begin.  Remember when I showed you my sad, sad living room?  Well voting is happening right now so if you can hop on over and vote for #69 (yours truly) I'd love you forever.  Just click on the star below #69 and that's it.  You can vote once a day.  Thanks for your votes in advance!


Today I show you how to make single seam cuffed pajama pants.  Y'all, these are so easy and you can make them in any size or style you want.  You will not find an easier pants tutorial.


Most pants you see will have an inseam and and outer seam that runs down the sides of the pants.  One seam pants have just an inner seam which means less work, more comfort.  This one seam technique is perfect for comfy pj's and lounge pants.

You can make these in any size, adult to kids, and once you have your pattern it takes less than 30 minutes to put it together.  Great for gifts for the upcoming holidays.  {Yikes!  Did I just say it was almost Christmas!?!}


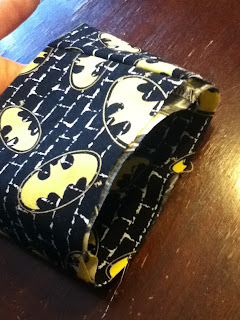
I also wanted to highlight The Ribbon Retreats Licensed Fabric and how great it is for boys.  What little man doesn't imagine himself as Batman or Superman?  The fabric is awesome enough for boys to want to wear and it gives us an excuse to craft for the guys in our life because let's face it, crafting for them can be so hard!  There is also licensed fabric for girls too so be sure to check it out.

Let's get started!

Supplies:


- Main Fabric, Batman Blue Logo
- Coordinating Fabric, Batman Black Brick
Thread
-  Pants Pattern (see below)


Step 1:  Create your pattern.  

Lay a pair of pants onto craft paper.  I buy my paper at the dollar store but you can also use the back of wrapping paper.  


Trace your pants by adding half an inch to the sides.  Add about an inch and a half to the top and 1-2 inches to the hem.  You'll see that I made the waist and the hem line as straight as possible.

You can make adjustments according to how your starter pants fit your child.  I wanted my pants to be looser than the jeans I measured from so I added a little room.

For the cuff you will mark 1-2 inches above the original hem.


Now you have two pattern pieces - a pant leg and a cuff.


Step 2:  Cut out your pieces.  

Lay your pant pattern on the fold of your main fabric.  Cut 2.


For the cuff, fold your coordinating fabric horizontally and then once over vertically (see photo below).  Lay your pattern piece on top, lining it up where the folds are and cut 2. 


You should now have a total of 4 pieces.


Step 3:  Lay the pants right side together and stitch the sections indicated in the picture.

{Don't let the different fabric throw you off.  I just forgot to take a picture of this step in the Batman fabric.  Sorry.}

Step 4:  Keeping right sides together open the pants up and stitch the entire curve of the inseam.


If you don't want a cuff to your pants you're basically done.  After this step you would just need to add an elastic casing and hem the bottom.  If you're wanting a cuff, read on...

Step 5:  Prepare the cuff. 


Sew the short sides of the cuff together, right sides together. 


 Fold the cuff in half with the seam on the inside. 


Attach the cuff to the outside of the pant (while they are still inside out) and stitch.  When you attach the cuff this way the raw or serged edge will be on the outside of the pant.  When you roll up the cuff you won't see it at all.  I like it this way because it creates a smoother inside and is more comfortable but if you'd rather the edge be on the inside of the pant than you would just attach in the same way with the pants right side out. 

Step 6:  Create a casing for the elastic.

 Fold over the waistband and stitch, leaving about a one inch opening.  Pull your elastic through and stitch it together.  Sew the opening closed.


I find that the best way to sew the elastic together is to lay one piece on top of the other and stitch together.
 
 
Step 7:  {Optional} 

The cuff should stay nicely when you flip it up but if you wish you can tack it in place with a few hand stitches on the side.  I didn't do this to mine.


   See how easy they are to make?  You'll have a dozen done before you know it.
 
If you make these jams I'd love to see a picture!
 
 
{This tutorial was originally posted at The Ribbon Retreat be sure to stop by and check out their awesome blog and shop.}


Tuesday, September 4, 2012

Vintage Revivals Room Makeover Submission

Okay, before we get started with this post I need to clarify one thing -
 
SOURCE
 
It's true, I promise.  I SWEAR! 
 
See my For the Home Pinterest board?  Awesome right?
 
Before I cause you to doubt it let me explain a few things.  John and I got married our senior year of college and we just needed to live on love so we didn't have much more furniture than a few dumpster dive finds and hand me down junk.  We graduated and moved across the country to Alabama where John went to graduate school and we bought our first house and had two great kids.  But it turns out that houses and kids are expensive and we never got around to buying real furniture.  My decorating budget is $0 annually and my house reflects it.
 
Mandi from Vintage Revivals is doing the most incredible giveaway in the history of blog world and I am here to beg for her to come to my place and wave her Mandilicious wand, and magically transform my living room.  So today I show you my shame in the hopes of a grand reward.  Don't judge me when you see it.  Okay, you can totally judge.
 
So let's rip off the band aid and get on with the embarrassment, shall we?
 
When you get to my front door you see my herringbone door mat and think, "Oh, that's a bright fun little mat.  The inside must be cute and crafty too."
 
 
And then you step in and see this...


And think this...


I know!  It's terrible!
 
But imagine how I feel!!
 
This is probably the saddest first world problem there is...

 
{yeah.  i totally made my own meme's.  i want this that bad}


"Wait... was that a BED in your living room?"


Uh.... yeah... let me explain...
 
When Jackson was born {2 years ago} we brought the mattress up from the basement for Grandma Cutts to sleep on.  We realized how nice it was to have an extra "couch" to sit on and it stayed.  For two years!  It's so hard to let go of extra seating even if it looks like an eternal slumber party and since I have no $$ I haven't even been able to try and disguise it as a day bed.  So instead everyone who visits says with squinty suspicious eyes, "A bed... who sleeps there?"  And then I have to explain the whole second "couch" thing so they don't think that we aren't in love or something because we totally are, we just love our couch/bed.  So embarrassing.


This is our kid corner.  The kids have completely taken this space over and while it's nice to have toys downstairs for when friends play I would love to have adult space that doesn't include a million Polly Pocket parts and dinosaur figurines.  Of at least not have it all on display.


Here's the view looking back at the front door.  The skinny door is a small coat closet that is jam packed with games and puzzles.  And there is Maggie deciding whether she wants to scatter Littlest Pet Shops or dominoes all over the floor.


There is this random part of the ceiling that I think holds an air duct.  It's covered in popcorn texture and for the life of me I cannot figure out what to do with it so I leave it alone in the hopes that it will blend in.


Here is our glorious entertainment area.  The Huggies box is acting as a secondary toy box. 


Take a good look at this vintage coffee table.  And by vintage I mean, fake wood laminate, smokey glass topped, gold trimmed giant piece of crap from 1985.


And check out this classy leaning tower of DVD's.  It's the 8th wonder of the world.

Now, let's get onto the decor...

 
Here is my little shrine to Maggie for her birthday.  Pictures are stacked on top of each other because she likes to take them down and look at herself.  You may think this is sweet that I decorated a little shrine for her but not when you realize that her birthday is Leap Day.  In February.  Over 6 months ago.  I just had nothing better to put there so it stayed.


Get your "pin it" buttons ready because you've never seen a gallery wall like this before!  It's basically the saddest gallery wall in the world.  Four pictures?  Wah wah...


Oh and look at my amazing ability to put appropriately sized pictures on the wall.  Those proportions are spot on right?   Gah!  And if you're wondering, yes, the heart garland IS from Valentines Day.  It was Maggie's first sewing project and again I haven't taken it down because I needed something to distract from the world's smallest picture frame.


To illustrate the proportion of the wall better here's a view from the kitchen.  And trust me when I tell you that I am sparing you're innocent eyes by not showing a better picture of our hideous green couch.  And I won't force you to look at my disgusting carpet either.  Is it sad that I've always dreamed of someday owning a rug?  The thought of it makes me feel super fancy.


So there you have it.  My shame out for the whole world to see.  On the bright side, at least I make cute kids even if I can't make a cute house.
 
So here is the part where I beg -
 
Dear Mandi and Hailee,
 
You've seen the sadness which is my living room.  This is only the tip of the iceburg in this house.  {My clothes are kept in plastic storage bins, but that's another makeover for another room.}  Clearly you can see that I am in desperate need of your genius.  Someday soon my husband will be graduating and getting a job and my budget will go from $0 to more than $0 and I need not only your makeover but your knowledge for when the day comes that I am left to my own decorating devices. 
 
Please come fix my house and show me the light that only you can.
 
You won't just be giving a girl a fish, you'll be teaching her how to fish and she'll be able to decorate for a lifetime.  {Okay that sounded weird but you get the point.}
 
Just think of how satisfying it will be to usher us into this new adult phase in our lives by teaching us how to use grown up furniture.

So please, please, PLEASE come to Alabama and fix this disaster so I no longer have to hang my head in shame.  Oh yeah, and if you come I have at least 5 thrift stores by my house and I'll totally take you to get real Southern BBQ, fried green tomatoes, fried pickles, banana pudding, the whole works.  No one can resist southern food!  I'm not bribing or anything I'm just sayin'.  Okay, yeah, I'm bribing.  Can you blame me?  I'm desperate!  And the beach is pretty close by too.  Okay!  Sorry!  I had to sweeten the deal a little.  I'm done now.  I promise.


Thanks Vintage Revivals and their sponsors for such a great opportunity!

Next week the general voting starts.  I hope you, my readers, will feel moved to pick me as saddest room so I can win.  I have a bed in my living room afterall! 

Wish me luck!!!  I need it!
 
Related Posts Plugin for WordPress, Blogger...