Showing posts with label Personalized. Show all posts

Thursday, May 30, 2013

Graduation Crafts! Diploma Cover Scrapbook

Hey, hey, hey! It's graduation time!  There's nothing like the feeling of letting all those school burdens go and feeling that sense of accomplishment.  Plus, it makes me want to sing School's Out by Alice Cooper and who doesn't love that song?  Nobody, that's who, because that song is awesome.

Johnny Boy and I got married our Junior year of college so we spent our Senior year and our first year of marriage enjoying date nights at the library.  Oh yeah, keepin' the romance alive.  Nothing says love like a 1,000 page science textbook.  We graduated Spring of 2006 from BYU-Idaho, John with a bachelor degree in Chemistry and me with a bachelor degree in Geology and Earth Science.  Nerds.  You can say it.  We know. 

John's parents were generous and bought us nice frames for our diplomas which left us with these empty diploma covers.  You know I wasn't going to let that go to waste.


The cover is a nice pleather and satin bound cover with our university stamped in silver on the front.  This isn't a piece of junk {I mean I paid thousands of dollars and years of my life to get it} and it had a greater purpose than just tossing it.

So I added a few scrapbook stickers and pictures from our big day and The Diploma Cover Scrapbook was born.


This scrapbook is John's.  Mine is basically the same.  Just with a few more pictures of my parents.


I also had these cute little diplomas that I stuck in there.  You can buy a similar one HERE.  If you don't frame your original diploma you could still keep it in the cover and just scrapbook the left cover.  Lot's of options here.

 
The scrapbook is nice and compact and fits on my bookshelf but I can also take it out every spring to remember the accomplishments that we achieved and look at how cute we look in black robes and cardboard hats pre-children.
 
 
Happy Graduation to All You Grads! 


Feel free to turn this post into a little graduation brag board - Did your baby graduate Kindergarden, High School, College?  Give a shout out to your High School {Reed High class of 2000!} or did you finally pass all your classes and get that higher degree?  Whatever it is, y'all have worked hard so be sure to brag about it below in the comments!  


Saturday, May 18, 2013

Personalized Paper Doll Quiet Books

I was going through old posts on my family blog today and discovered this fun project I did for Maggie a few years ago.  It's a personalized paper doll quiet book.  This book was very easy to make and could be used not only for entertainment but would be a great way to help with speech therapy, or even learning how to match and dress oneself.


How I made my book:

1.  I used my Cricut cartridge, Paper Doll Dress Up to create all of the images, however you could always just cut out pieces by hand if you do not have a Cricut.

2.  I created the main doll by cutting out a doll and trying to make it look as much like Mags as possible, long brown hair, blue eyes etc.  I also used different outfits on the cartridge to make an undershirt and underpants.  {The fewer naked dolls we have around here the better.  Why are there always so many naked Barbies at my house??}  I also decorated the background page by cutting out grass and flowers.

3.  I then used patterned paper and cut out a few dresses.  You could also cut out shoes, socks, pants, shirts, hats, headbands, wands etc.  This cartridge basically has everything.

4.  I then used my personal laminator to laminate all the pieces.  I laminated the entire page of the main doll and each dress individually.

5.  Glued the main page into a cheapy file folder.

6.  On the back of each of the dresses is a piece of sticky tack.  This allows for the pieces to be placed on the doll and stay in place.


Super simple little book that can provide lots of entertainment for your little one!

If you're looking for more ideas for paper dolls be sure to check out my tutorial for


Wednesday, June 20, 2012

The School Tee

Here's another fun t-shirt idea for kids {or even grown up kids too!} The School Tee.


I've seen this idea floating around the internet for a while so this Christmas I made one for Mags.  It was REALLY easy.

I painted blue stripes every inch or so across the whole shirt.  I left it streaky because that was always the lined paper I liked but if you want yours more solid a paint pen would work really nicely.  I then added a more solid red line down the side.  For the holes I just colored them in with a permanent marker.


Now I don't know about you but I wasn't always the most studious or focused.  My former school mates can testify.  So instead of notes on my papers they were most definitely filled with scribbles.  This tee needed scribbles.  Using a fine tipped permanent marker I drew a few little scribbles to make this tee a little more personalized.

Sadly, Miss Mags got to wear her special tee in public only once, on New Years Eve.  After a nice family outing to a UAB basketball game she cut the palm of her hand.  8 hours and 3 stitches later, we rang in the New Year in the ER.  Yay.  Let's just say, the shirt got a little ruined in all the excitement.  Guess that just means I have an excuse to make another one!


To view details on other tees from The Creative Vault click on the picture


Visit thecsiproject.com

Monday, June 11, 2012

Car Play Mat & Storage Bag

I said I needed to show you more boy stuff so here's a fun one!

I wanted to show you something that had it all - Sewing, scraps, BOYS {and Girls!}, play, Imagination, DETAILS,  repurposed, STORAGE, cute fabric, Bright Colors... you get the point.  I hope I didn't disappoint!

Introducing.... The Car Play Mat & Storage Bag!


Each piece was drawn and cut by hand and appliqued onto the mat.  With a park, zoo, speedway, beach, neighborhood and church there is a whole town full of imaginative adventure waiting to happen.  Each piece of fabric was chosen to look authentic, waves for the ocean, brick for the zoo wall, florals for the bushes and trees, cobblestones and sand, even the stained glass windows on the church, etc.  Let's just say, I have a lot of random scraps around the house!


The kids love to play with the mat but the fact that the mat is easily cinched into a bag to store all those little cars is what gets momma REALLY excited!  We can easily carry the bag with us to appointments and activities to keep us entertained during those long waits.  And when we are done, one tug of the cord and "bloop!" all cleaned up.


I think everyone needs a Car Play Mat & Storage Bag.  I hope you agree!

Friday, June 8, 2012

Nursery Blocks & Subway Art

Welcome to my new followers!  At first glance it might seem like this is a sewing blog.  But really it's an everything blog.  I've just been addicted to sewing lately.  So let's mix it up shall we?

Today I thought I'd show you a little baby gift I made for a friend a while ago.  You guys, this baby is so cute and small and sweet.  Babies are just the best.


I made these little nursery blocks from my scrap wood pile.  I wish I would have taken their measurements but they were pretty petite.  I think the big one is a one inch board that's 10 x 7 {I don't know, I'm just making that up really} and the smaller blocks are made from 2 x 4's.

The smaller blocks are for sitting on a shelf but the subway art has a metal tooth hanger on the back and has the option of being hung.  For the images I used my Cricut and Sure Cuts A Lot program.


For the owl I used a vinyl stencil of the outline of the owl and painted the entire thing brown.  Once it was dry I cut out another stencil that had the eyes, feathers and wings and stenciled that part white.


To create the aged look to the finish I randomly painted brown spots on the edges and corners.  I then rubbed Vaseline over the brown spots and then covered the whole thing in pink paint.  The pink didn't want to stick to the parts that were Vaselined and I rubbed the pink away in those areas with a baby wipe.  It gives it a shabby chic vintagey feel.


For the tree I just did the same thing as the owl.  I use one stencil and painted the whole thing brown and then made another stencil for the leaves and trunk and painted that one white.  Just a simple layering of stencils can make for a fun result.

Simple little keepsake blocks that anyone can make.  If you don't have a cutting machine you can make a stencil with vinyl and an exacto knife or even try a little hand painting.  You could conjure up your skills from the days of toll paining in the 90's.  {Please tell me I'm not the only one that remembers toll painting.}

Now,  what I really need to do to switch it up is show you some boy crafts.  Stay tuned.  I'll be showing you a really fun one next!


Wednesday, May 2, 2012

Ballet Teacher Appreciation Clip Board


Well, this weekend we wrapped up a whole years worth of ballet lesson with Maggie's 1st recital.  She had an adorable little solo and she just melted her mommy's heart.  It's a good thing she's always so confident because I was a nervous wreck.  She performed beautifully and I couldn't have been more proud.

Her teacher has done so much for her and I really wanted to make her something that she could use and something to remember Mags by.  My friend JJ had the clever idea of getting her a clipboard.  Perfect! 

She takes ballet at one of the large churches down here.  If you're not familiar with the south, theere are lots of large churches and most have preschool and school programs, rec centers, classes and more.  They are very similar to community centers.  We don't attend church here {we go HERE} but we love our time spent with our new friends.  Before each class the girls get together and sing a song called a ballerina prayer.  My favorite lyric of the song is 

"Make me a good ballerina Lord, 
I'll practice hard each day."


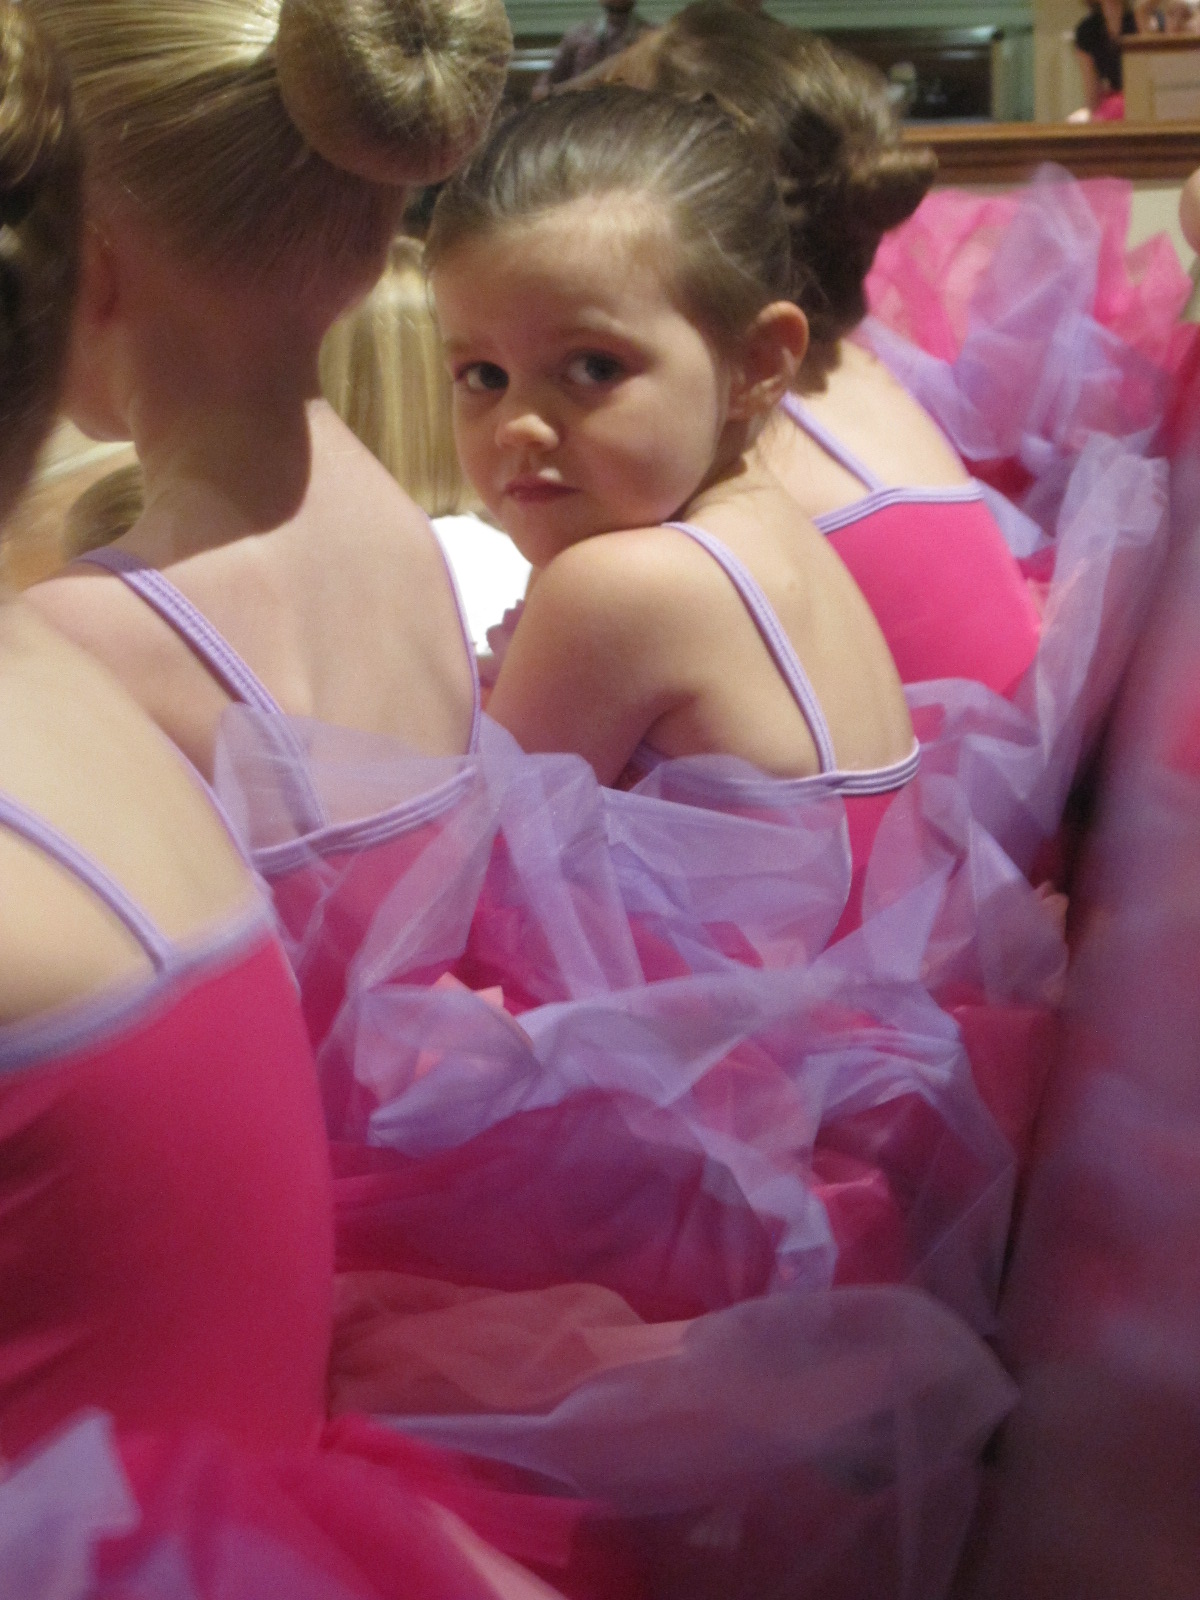
I wanted to include part of it on her clipboard.  I'll show you how I did the whole clipboard but first I just have to show you the sweetest little ballerina that ever lived.


She's just so sweet.  Looking at these pictures almost makes me forget that she drew all over the walls yesterday.  Almost.

Okay, so back to the clipboard -


How I did it:  I got the clipboard in a pack of 3 for $3 from Office Max.  You can also purchase them here on Amazon.  It was just that solid particle wood kind.  I sprayed all the metal parts with spray primer.  I then randomly painted brown spots and corners on it {I wanted it to look shabby chic}.  Once the brown paint was dry, I went over the spots with Vaseline.  On top of that I painted the whole thing pink.  Where the Vaseline was the pink paint didn't sick and I was able to wipe away the pink to reveal the brown.  I really liked the worn look it gave the board.

Once the pink dried I used my Cricut and Sure-Cuts-A-Lot program to create a stencil of her teachers name, along with the saying and a silhouette of a ballerina.  I was worried that the excessive rubbing of the top of the board would eventually rub the paint off so I tied some ribbon and rickrack to the top to finish it off.


A gift that is personalized but is also functional.  You really can do so many things with a clipboard for your children's coaches and teachers.  We are just so grateful for all the things Mrs. Andi taught Mags.

Okay I have to do it.  One more picture of the Magster in all of her ballerina cuteness -


Dad and brother gave her flowers and she was over the moon!

If you're looking for more ballet ideas be sure to check out

and


Monday, February 20, 2012

Adelyn's Dress

Maggie's speech therapist is having her first little baby.  We are so excited for her!  Her therapist is just the sweetest and has helped Maggie progress in her speech so much.  We wanted to do something special for her and her baby girl, Adelyn (Add-uh-Lynn) .  Isn't that such a beautiful name!?!

I made her this little peasant style dress from a nice thick white cotton.  It is seriously one of my favorite dresses that I've made.  I only wish my pictures could show you it's full sweetness.


The neck and arms have elastic.  I created a matching hair bow from the scraps of fabric and ric rac.

This is what makes it my favorite though - the light teal ric rack and the pink hand embroidered name.  I haven't done any embroidery in a LONG time.  It was really so easy.  I don't know what has been holding me back.  I simply wrote her name in pencil and traced the marks with my needle and thread.


I think what makes this my favorite though was that I took the time to create French seams.  It makes for such a beautiful inside and steps up the quality of the dress by about a million notches. I was so glad I did this step it made it feel more boutique as opposed to just handmade.


As cute as this little dress is, I know it is nothing in comparison to how cute that sweet baby will be!


Anyone ever used French seams?  Interested in learning how?  Just speak up and I'd be happy to create a tutorial.  Well, I'm off to sew some more!


Thursday, February 16, 2012

{Tutorial} Personalized Christmas Card Bookmarks

In January I was visiting over at So You Think You're Crafty, a super fun craft competition blog.  They are in the middle of a season so go on over an follow along.  I'm obsessed with competition so you know I love it.  Missy was kind enough to feature this tutorial - so here it is if you missed it.  Enjoy!

________________________


If you know me at all you know that I absolutely LOVE to re-purpose things.  There is something so satisfying about turning something old into something new.  Nearly everything I do is re-purposed in some way.  It's important to me to use what I have and not be wasteful.  For tips and rules on salvaging items you can read my post HERE.

Today I wanted to show you a personalized gift that you can make using leftover Christmas cards.  I love getting Christmas cards but I hate throwing them away come January.  I really have no need to keep them, so I often like to turn them into a cute bookmark to give back to my friend.  It's a simple little thing you can give as a little birthday gift or even a "thanks for being my friend" token.  The best part is you know they like the picture.  Heck, they're the ones that picked it out!    


There are so many possibilities.  You can even use your own leftover cards or pictures to make gifts for the grandparents or rip through your old magazines.  I mean what tween doesn't want to be staring at Justin Bieber while reading that book for English class?  And yes, I'll admit the super creepy bookmark of Edward Cullen is mine.  What can I say?  I just can't read Twilight without it.


But I digress... let's get back to the Christmas cards.  These not only are great because they are personalized but they are durable, and cute.  I also like that they are large in size so you're not losing it, but not so thick that you warp your book

Want to make your own????


Supplies:
  • Card or other picture
  • Card stock paper
  • Fabric scraps
  • Ribbon scraps
  • Scissors
  • Glue Stick
  • Sewing machine
  • Lamination machine OR clear contact paper OR clear packing tape


Step 1:  Cut out picture from card and attach to card stock with glue stick.  Cut the entire piece to be about the size that you want your bookmark to be.


Step 2:  Laminate entire bookmark.**

I have my own lamination machine.  It was very inexpensive {around $25 from Sam's Club} and I use it for everything.  If you don't have a lamination machine and if you don't know a teacher who can hook you up, you can go to a copy store or parent teacher store.  You can also buy laminating pouches that don't require heat.  Or you can just cover the front of your picture with clear packing tape.

**This step can be skipped but I find that protecting the picture keeps smudges off the photo as well as makes it water resistant.


Step 3:  Trim off extra lamination.


Step 4:  Lightly use glue stick to adhere scraps of fabric around the picture on the front of the bookmark.  You just want a small amount of glue to hold the fabric in place long enough to keep it in place for the next step.


Step 5:  Using your sewing machine, sew around the photo to secure the fabric to the bookmark.


Step 6:  Trim up the fabric creating about a 1/4 inch boarder.


Step7:  Attach ribbon to the back of bookmark.


Step 8:  Cover the back of bookmark with another piece of fabric.


Step 9:  Sew around the entire outer edge
.

Ta-da!  

If you put two pictures together you can use ribbon to separate each picture, like I did in the photo below.

This is a super versatile project and you can really get creative and make this your own.  So grab those cards and fabric scraps and get creative!


Related Posts Plugin for WordPress, Blogger...