Saturday, March 3, 2012

Shaun the Sheep Cupcakes {tutorial}


Happy Baaaah-lated Leap Day!!

Leap Day is kind of a big deal around here.  HUGE in fact because this year Maggie got to celebrate her 1st birthday!  That's right, she's a Leap Day baby!


In February 2008 we were expecting her.  Her due date was at the beginning of the month but part way through my pregnancy they pushed her due date back two weeks.  Then something happened that I wasn't expecting she was 12 days late.  Not that's not a typo - TWELVE.  I felt like I was pregnant for 11 months. After about a week over due, the doctor wanted to schedule an induction.  I asked if we could do the 29th because heck I've waited this long might as well get the girl a cool birthday while I'm at it.  Well, I checked into the hospital the night before and they were going to induce me at 6 AM.  Turns out I didn't need an induction afterall because I went into labor that night.  It was meant to be!  A unique birthday for a very unique little girl.  She was the only one born in our hospital (which is a big one) that day.  So special!  

Since I get asked this a lot I'll tell you that we celebrate her birthday on non-leap years on February 28th.  Though I tend to get carried away and celebrate all week.  Also, we have so far not had any problems with her birthday being on Leap Day.  On non-leap years she still gets birthday rewards from stores and I've never had paper work or official document problems with it either.  It's just a super fun day to have a birthday!

Okay - now back to the cupcakes.

It's Shaun the Sheep!!!  


For those who don't know Shaun the Sheep is a clay-mation TV show by the same people that do Wallace & Grommit.  You can watch it on Netflix or buy it on Amazon.  It's actually a very funny cute show. 

Shaun the Sheep is Maggie's favorite everything.  This is her getting ready for bed wearing the Shaun hat her Nonie made for her (more on that one later) and holding the little Shaun from her G&G Cutts.  All while watching Shaun the Sheep on the DS.  At night she asks me to sing her the theme song before she goes to sleep.  Spoiled.


This year the only thing she asked for for her birthday was Shaun the Sheep cupcakes.  When your child who has problems with communicating with speech, never asks for anything, and has a birthday only every four years asks for Shaun the Sheep cupcakes you better get that girl Shaun the Sheep cupcakes!

Here's what I came up with.


Want to make your own?  They are a lot easier than they look.  I promise.


Supplies:

Cupcakes
White frosting
Mini-Marshmallows
Mini-chocolate chips
Wax or parchment paper
Piece of paper
Cookie Sheet
Sandwich bags or piping bags


 Step 1: 

Draw the shape of the Shaun head on a piece of paper.  I practiced a couple of times before I settled on one.


Step 2:

Melt about 1/4 to 1/3 cup of chocolate chips in a sandwich bag.  Place chips in bag and place in microwave for 20 seconds.  Take out and lightly squish the chips to mash/mix them.  Continue this process of heating for 20 second intervals until chocolate is melted.  Slice off a tiny corner of the baggie when done.


Step 3:

Place wax or parchment paper on top of drawing.  Pipe chocolate onto wax paper to fill in the shape.  Don't worry if it's lumpy.  The lumpy part is the back of Shaun's head.  You won't be seeing it.


Step 4:

Repeat as many times as you want and place Shaun heads on a baking sheet and place in the fridge or freezer to harden.


Step 5:

Once hardened, peel off the heads and flip them over.  Use the icing to create two dots for eyes.  Inside each white dot place an upside down mini chip for the dark center of the eye.  And you're done with your Shaun head!


Step 6:  

Frost your cupcake.

Step 7:

Cover cupcake in mini-marshmallows.

Step 8:

Use a dollop of frosting to attach the Shaun head to the cupcake body.


These sheep are so cute and so yummy.  The girls loved them but most importantly Maggie loved them.  The joy on her face was priceless.  So happy to make a little girls birthday wish come true!


{P.S.  You can find Season 1 and Season 2 of the show at Amazon.  Along with several short movies that we've never even knew existed.  Also, here is the Shaun the Sheep plushie that she got.}

Monday, February 20, 2012

Adelyn's Dress

Maggie's speech therapist is having her first little baby.  We are so excited for her!  Her therapist is just the sweetest and has helped Maggie progress in her speech so much.  We wanted to do something special for her and her baby girl, Adelyn (Add-uh-Lynn) .  Isn't that such a beautiful name!?!

I made her this little peasant style dress from a nice thick white cotton.  It is seriously one of my favorite dresses that I've made.  I only wish my pictures could show you it's full sweetness.


The neck and arms have elastic.  I created a matching hair bow from the scraps of fabric and ric rac.

This is what makes it my favorite though - the light teal ric rack and the pink hand embroidered name.  I haven't done any embroidery in a LONG time.  It was really so easy.  I don't know what has been holding me back.  I simply wrote her name in pencil and traced the marks with my needle and thread.


I think what makes this my favorite though was that I took the time to create French seams.  It makes for such a beautiful inside and steps up the quality of the dress by about a million notches. I was so glad I did this step it made it feel more boutique as opposed to just handmade.


As cute as this little dress is, I know it is nothing in comparison to how cute that sweet baby will be!


Anyone ever used French seams?  Interested in learning how?  Just speak up and I'd be happy to create a tutorial.  Well, I'm off to sew some more!


Thursday, February 16, 2012

{Tutorial} Personalized Christmas Card Bookmarks

In January I was visiting over at So You Think You're Crafty, a super fun craft competition blog.  They are in the middle of a season so go on over an follow along.  I'm obsessed with competition so you know I love it.  Missy was kind enough to feature this tutorial - so here it is if you missed it.  Enjoy!

________________________


If you know me at all you know that I absolutely LOVE to re-purpose things.  There is something so satisfying about turning something old into something new.  Nearly everything I do is re-purposed in some way.  It's important to me to use what I have and not be wasteful.  For tips and rules on salvaging items you can read my post HERE.

Today I wanted to show you a personalized gift that you can make using leftover Christmas cards.  I love getting Christmas cards but I hate throwing them away come January.  I really have no need to keep them, so I often like to turn them into a cute bookmark to give back to my friend.  It's a simple little thing you can give as a little birthday gift or even a "thanks for being my friend" token.  The best part is you know they like the picture.  Heck, they're the ones that picked it out!    


There are so many possibilities.  You can even use your own leftover cards or pictures to make gifts for the grandparents or rip through your old magazines.  I mean what tween doesn't want to be staring at Justin Bieber while reading that book for English class?  And yes, I'll admit the super creepy bookmark of Edward Cullen is mine.  What can I say?  I just can't read Twilight without it.


But I digress... let's get back to the Christmas cards.  These not only are great because they are personalized but they are durable, and cute.  I also like that they are large in size so you're not losing it, but not so thick that you warp your book

Want to make your own????


Supplies:
  • Card or other picture
  • Card stock paper
  • Fabric scraps
  • Ribbon scraps
  • Scissors
  • Glue Stick
  • Sewing machine
  • Lamination machine OR clear contact paper OR clear packing tape


Step 1:  Cut out picture from card and attach to card stock with glue stick.  Cut the entire piece to be about the size that you want your bookmark to be.


Step 2:  Laminate entire bookmark.**

I have my own lamination machine.  It was very inexpensive {around $25 from Sam's Club} and I use it for everything.  If you don't have a lamination machine and if you don't know a teacher who can hook you up, you can go to a copy store or parent teacher store.  You can also buy laminating pouches that don't require heat.  Or you can just cover the front of your picture with clear packing tape.

**This step can be skipped but I find that protecting the picture keeps smudges off the photo as well as makes it water resistant.


Step 3:  Trim off extra lamination.


Step 4:  Lightly use glue stick to adhere scraps of fabric around the picture on the front of the bookmark.  You just want a small amount of glue to hold the fabric in place long enough to keep it in place for the next step.


Step 5:  Using your sewing machine, sew around the photo to secure the fabric to the bookmark.


Step 6:  Trim up the fabric creating about a 1/4 inch boarder.


Step7:  Attach ribbon to the back of bookmark.


Step 8:  Cover the back of bookmark with another piece of fabric.


Step 9:  Sew around the entire outer edge
.

Ta-da!  

If you put two pictures together you can use ribbon to separate each picture, like I did in the photo below.

This is a super versatile project and you can really get creative and make this your own.  So grab those cards and fabric scraps and get creative!


Wednesday, February 15, 2012

Real Valentines Day

I know when I posted my Valentines that I said I would post the great Valentines I received from The Stationary Place Valentine Swap yesterday but I was delusional.  I watched 11 kids yesterday.  When in the world did I think I would have time to blog?  Oh well.  Today is REAL Valentines Day.

That's right, while the world is fighting the crowds and overpaying for tokens of love we are treating it just like every other day because for the Cutts family Valentines Day isn't until the 15th.  After a Valentines day several years ago where we went to 4 sold out movie theaters, watched a mother of two get arrested after an altercation with a man over the parking spot we just left at our favorite bakery and having to settle for a romantic dinner of fast food we decided it just wasn't worth the hassle and permanently changed the holiday.  Best decision ever.

So without further ado I'd like to show off the fun Valentines I got from my new pals.  


First up is the coolest piece of mail I've ever received from


I had to snag this photo from her site because we were so excited about our Valentine that the kids and I ripped it apart and devoured the candy before I could snap a picture.  It came just like this with postage stamped on the front.  It provided us with an evening of fun, opening up each little pockets and giggling as we scarfed it all down.  Let's just say watching a baby eat Pop Rocks is hilarious.

Click on the picture or click HERE for a tutorial on how to make this cool Valentine.
I can see myself sending something like this to my nieces and nephews for their birthday.


The next Valentine I received was from


Love the graphic print!  It's so simple and beautiful.  I also adored the little touches with the Washi tape and the Van Gogh quote.  I had never heard it before and it is so beautiful!


This next one is from

Michaela


Can we just say CUTE!!!   Valentines day isn't Valentines day without red, pink and hearts and Michaela nailed it.  I love that she used the little hearts as the steam from the cup.  She sure knows how to serve up a hot cup of LOVE!  ; )


Last but not least

Hannah @ Hannah Made


Let's just discuss this bunting for a minute shall we...  I love it!  I love bunting but never have I thought to make tiny paper bunting and put it on a card.  So clever!  The time and patience it must have taken to make tiny flags and and get that bakers twine pulled so perfectly tight.  It has me seeing hearts!


THANKS SO MUCH GIRLS!  
You're all so creative and talented and totally made my day when I received these.  Your kind words and messages were so sweet.  Hope you had a special day filled with love, love, and chocolate. 


Happy Real Valentines Day!!!


Monday, February 13, 2012

Will You Be Mine??

I'm kind of a weird crafter.  I almost never do holiday crafts.  I don't know why.  I think the holidays just sneak up on me and I never get around to it.  And to be honest I kind of get sick of seeing a million holiday themed crafts after a while.  This year though my friend Elizabeth posted about a Valentine Swap she was doing at The Stationary Place.  I saw this as a fun way to make a fun Valentine craft as well as meet some new people.  It was a blast!  I'm so glad I participated!

Tomorrow I want to show you the adorable and fun cards I received from my new pen pals.  I have yet to take pictures of their creations, but I did want to show you what I came up with before the holiday slipped by me.


I kept going over what I should make in my mind but it wasn't until the kids and I were making shrinky dinks one night did I settle on a plan.  We used an old lunch to-go box container and permanent markers to make the shrinky dinks (tutorial to come) and I attached each heart to a bit of chain.  I got the chain from a big pack of key chains they had at the Dollar Tree.

I hot glued the chain to the teal paper and then glued jumbo red rick rack over top of that.  The little love thing in the corner is a piece of scrapbook paper that I painted a swipe of teal paint on.  Once the paint dried I used a stamp to stamp the LOVE.  I then used my sewing machine to zig zag stich it onto the card. Simple but fun.


On the inside I included a little surprise.  A tiny little bookmark.  I can do a tutorial for this one too but basically I just hand stitched around a little piece of teal wool felt.  I hot glued it to a paper clip and then glued another plain heart to cover the back.  I attached the bookmark to the card by making a tiny slit in the paper so that's why you can't see the other loop of the paper clip.


Confession:  I had to make one for me too.  To put in my Hunger Games book.  Because I {heart}it so much.  Can I get a squeal for the upcoming movie release?  Eeeeeekkkk!!  I can't wait!!  


One of my darling children {read that with sarcastic disgruntled mom voice} loved the heart charms so much they took off with one of them and I have yet to have found it.  Grrrr... so I'm sad to say not all four of my cards were the same.  Sorry to whomever ends up with the random card but lace, felt and a metal brad are nice too right??


Finished off in a nice little envelope sealed with some heart tape.


Hope all my readers have a Happy Valentines Day tomorrow!

I sure do love ya'!!!


Thursday, February 2, 2012

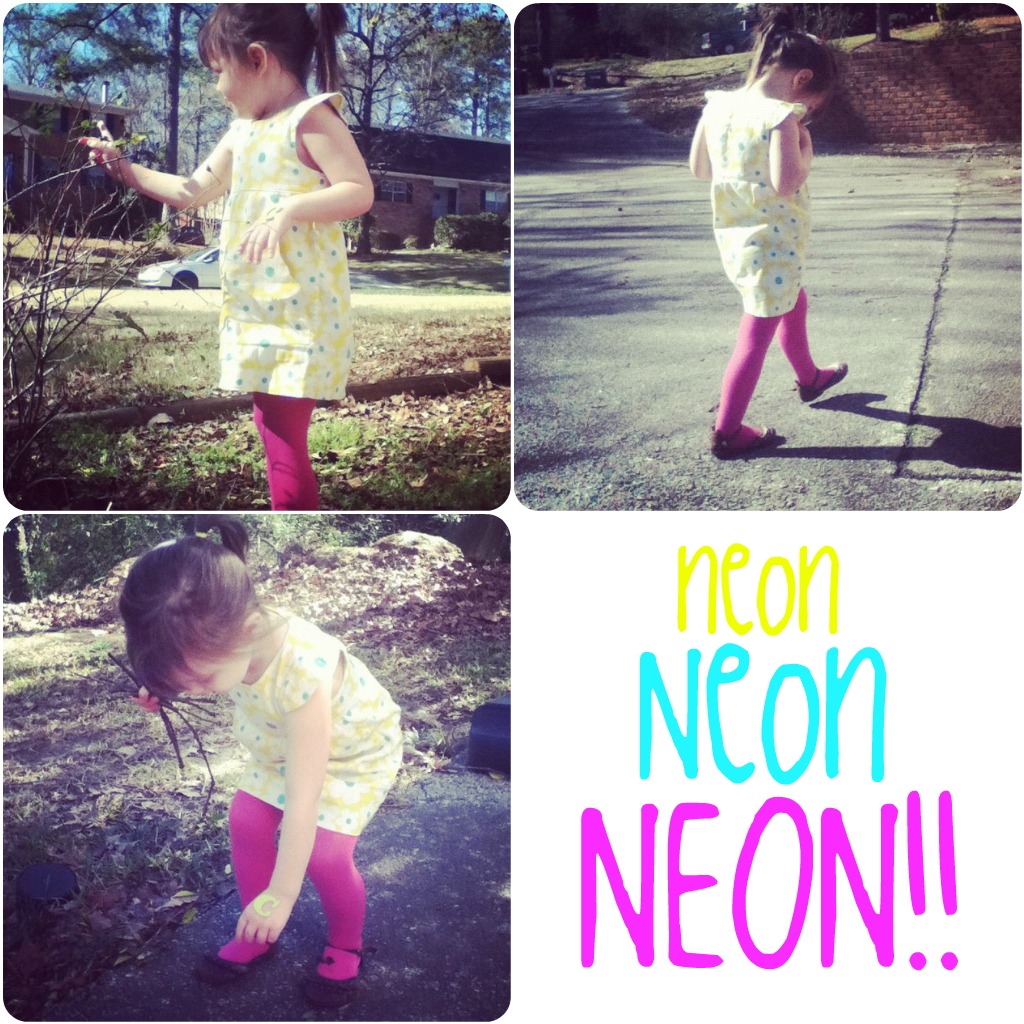
Neon! It's back baby!

Remember the Mod Mod Dress I made Maggie this summer?

She's almost too big for it now but we got at least one more wear out of it this Sunday.

Mags picked out her own outfit the night before and was really excited about it the next day.  She may be just 3 but that girl has style!  When she paired that bright yellow and teal vintage fabric with a pair of thick hot pink tights I was like, "Yeah baby!"


The bold colors were  a breath of fresh air.  So here's what you can expect from me this year BOLD COLORS!!!!  Okay you'll see some not so bold colors too from time to time but little Mags has inspired me  to "Go Bold or Go Home!".  


Wednesday, February 1, 2012

Cinnamon Rolls in the Waffle Maker

My husband turned 31 this week.  Happy Birthday John!  For one of his gifts I got him a waffle iron.  Like the nice kind.  That flips.  And is 1 1/2 inches thick.  He was so happy.

I never make breakfast but he loves it.  I've never really cared for it.  So it surprised me that I am more obsessed with this thing than he is and he's the waffle lover.

I've been throwing everything I can think of into the thing.  My favorite so far??

Cinnamon Rolls!!!

Best cinnamon rolls of my life.  Perfectly and evenly cooked in minutes.  They still pull apart and the waffle tops keep that gooey frosting on so well. 


I posted these pics on Facebook and had lots of requests for directions so here's all you need to know.

Step 1:  Open up a can of cinnamon rolls.  I used Pillsbury Cinnabon rolls.
Step 2:  Preheat iron and spray with pan spray if necessary.
Step 3:  Place a roll in each section.
Step 4:  Cook like you would a waffle.  I cook mine on medium heat and then watch the done light to come on.  Im guessing each machine is different.
Step 5:  Top with frosting and try not to eat the whole batch by yourself.


So easy right?!?

Okay, I won't keep you any longer.  I know you're dying to run to the kitchen to make some...


Related Posts Plugin for WordPress, Blogger...