Tuesday, May 8, 2012

hello. {herringbone painted doormat}

Sometimes I see something online and I think oh that looks so easy! Then I try it and yeah... It wasn't as easy as it looks.

Painting rugs and herringbone print so easy right? Not exactly.

I had a door mat that was basically disgusting. It was that industrial grey carpet and was left over from the previous owners so it was what? 10 years old? Yuck. So I thought I'd give it a makeover.

Here's where stuff got complicated- First of all, if you paint a rug you should probably just take a normal neutral rug and add a stencil design. Painting the whole thing takes A LOT of paint (it soaks it right up) and it leaves a crazy texture. It's more like a plastic mat now. Not exactly functional but it looks ok.

Secondly if you do herringbone or chevrons or zig zag (yes they are similar but separate designs) don't be lazy like me and get out a ruler. Turns out eyeing it doesn't work as well and you'd think. As you can see my herringbone is a little (or a lot) crazy.

So in short I wouldn't exactly call this a craft fail since it was free and I like it okay but I think I'll consider it a lesson learned for next time.

Have any of you tried either of these things? How did it turn out? I'd love to see what you did!

Wednesday, May 2, 2012

Ballet Teacher Appreciation Clip Board


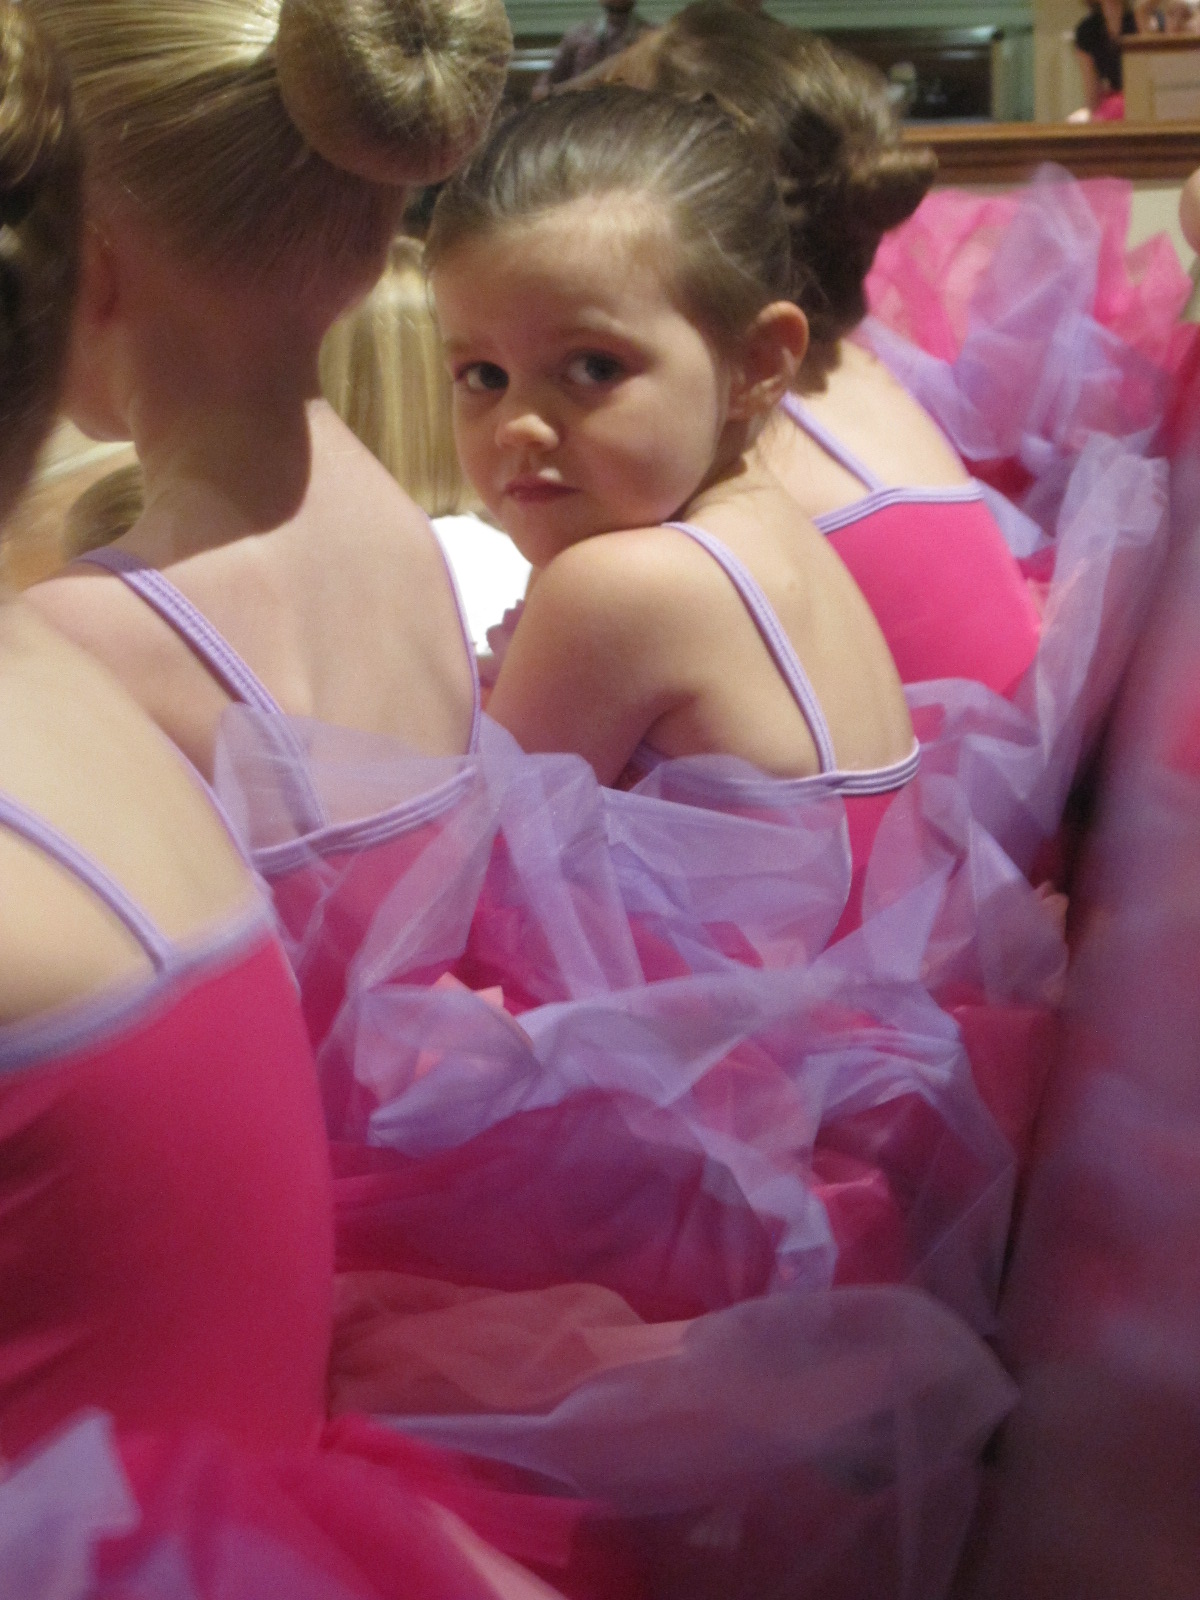
Well, this weekend we wrapped up a whole years worth of ballet lesson with Maggie's 1st recital.  She had an adorable little solo and she just melted her mommy's heart.  It's a good thing she's always so confident because I was a nervous wreck.  She performed beautifully and I couldn't have been more proud.

Her teacher has done so much for her and I really wanted to make her something that she could use and something to remember Mags by.  My friend JJ had the clever idea of getting her a clipboard.  Perfect! 

She takes ballet at one of the large churches down here.  If you're not familiar with the south, theere are lots of large churches and most have preschool and school programs, rec centers, classes and more.  They are very similar to community centers.  We don't attend church here {we go HERE} but we love our time spent with our new friends.  Before each class the girls get together and sing a song called a ballerina prayer.  My favorite lyric of the song is 

"Make me a good ballerina Lord, 
I'll practice hard each day."


I wanted to include part of it on her clipboard.  I'll show you how I did the whole clipboard but first I just have to show you the sweetest little ballerina that ever lived.


She's just so sweet.  Looking at these pictures almost makes me forget that she drew all over the walls yesterday.  Almost.

Okay, so back to the clipboard -


How I did it:  I got the clipboard in a pack of 3 for $3 from Office Max.  You can also purchase them here on Amazon.  It was just that solid particle wood kind.  I sprayed all the metal parts with spray primer.  I then randomly painted brown spots and corners on it {I wanted it to look shabby chic}.  Once the brown paint was dry, I went over the spots with Vaseline.  On top of that I painted the whole thing pink.  Where the Vaseline was the pink paint didn't sick and I was able to wipe away the pink to reveal the brown.  I really liked the worn look it gave the board.

Once the pink dried I used my Cricut and Sure-Cuts-A-Lot program to create a stencil of her teachers name, along with the saying and a silhouette of a ballerina.  I was worried that the excessive rubbing of the top of the board would eventually rub the paint off so I tied some ribbon and rickrack to the top to finish it off.


A gift that is personalized but is also functional.  You really can do so many things with a clipboard for your children's coaches and teachers.  We are just so grateful for all the things Mrs. Andi taught Mags.

Okay I have to do it.  One more picture of the Magster in all of her ballerina cuteness -


Dad and brother gave her flowers and she was over the moon!

If you're looking for more ballet ideas be sure to check out

and


Wednesday, April 25, 2012

Little Maverick

I'm still working on the tutorial for the Bubble Ruffle Tu-Tu but in the mean time let's get things a little more manly up in here.  Poor Jackson, along with all the little men in our lives, seems to be pushed aside when it comes to new clothes.  But not today!

Here is a cute little shirt I made for Jackson for Christmas.  It was so simple and easy and gets so many compliments {mostly from guys who think it's "cool"}.


How I made it:  I made a freezer paper stencil of aviator glasses.  I used my Cricut and Sure-Cuts-A-Lot program but you could just print an image directly to your freezer paper and cut out with an exacto knife.  I ironed it onto a plain white t-shirt.  I put cardboard inside the shirt to protect the back side and then painted inside the stencil with black paint {that I added just a little fabric medium to}.  Peeled off the freezer paper stencil and I was done.


Here he is at 15 months old watching a UAB Blazer basketball game on New Years Eve.  As you can see he is very serious about his basketball.  Literally his first words were "Daddy", "Mommy" and "Basketball".  I'm serious.  Sadly the little champ is built more for football.  Dad doesn't mind but I don't know if I can sit through endless football games for the rest of my life.  Lets keep our fingers crossed for a basketball kid shall we?


This is his "cheese" smile.  As you can see the proportion of the stencil on the shirt looks a little off.  That's because at this time the shirt was huge.  It's a 2T shirt.  Little Papa has beefed up a little since then and the proportion is much better.


Here he is at 18 months at the 103.7 the Q lounge where we got a mini concert and a meet and greet with Chris Rene {my favorite!} from X-Factor.  If you don't know him yet, you soon will, he's Simon Cowell and LA Reids newest musician.  I won a contest.  It's a long and wonderful story and I'll fill you in on the details later but can you see the shirt has a much better fit?  It will get even better as he gets bigger.

So what are you waiting for?  It's time to stop craft neglecting our boys.  It's t-shirt time baby!

If you're looking for other ideas for shirts you can check out Jacksons


and 


{This shirt is totally girly but you can easily man it up by not adding the pearl collar}

Tuesday, April 24, 2012

Blogger Apps and a tutorial promise

First of all, I want to say welcome to my new followers. I appreciate all of my readers and hope that you find The Creative Vault to be a source of inspiration in your own creative endeavors. Thanks for following along.

Now, onto the news of the day. Did you know that blogger now has an app where you can blog from your iPod/iPhone/whatever?

I just discovered it a few minutes ago and thought I'd test it out. I like that it's free and uploading my pictures is super fast and easy especially since I take almost all my pics with the iPod. I haven't figured out if I can do a picture then text then a picture and more text, you know like a regular blog post but for posts with just one or only pictures this is so great.

Anyone else have this app? How do you like it? Any tips for newbies like me?

I'm so excited I'll be blogging more often since this iPod is practically glued to my hand and my computer is sitting under piles of unfinished crafts.

Speaking of blog posts I have to say thank you so much for your kind words about the Bubble Ruffle Tu-Tu. I can't believe how much attention it's getting! It makes me blush. :) It didn't win the Sew Along competition (actually didn't even get honorable mention) but I don't care, it's just fun hearing from you guys and making my baby girl smile.

I wanted to tell you that I AM working on a tutorial on how to make it so stick around. I hope to have it finished by this week.

Thanks again for being the best!

Thursday, April 12, 2012

The Bubble Ruffle Tu-Tu

UPDATE - The tutorial is here!  You can get the tutorial HERE.


A few weeks ago I auditioned to be a contestant on Project Run and Play, a competition blog for children's designs. Sadly, I did not make the cut but there were many kind people who offered me their shock, kind words and condolences. It was seriously so nice. I know many of those kind people are now followers of The Creative Vault and I just want to say thank you for making me feel special.

Those same kind people also encouraged me to participate in Project Run & Play's Sew Along. The sew along is the same challenge for the week as the designers but it's a separate sew at home competition. There's a prize for each weeks winner but mostly it's just fun to rise to a challenge.

This weeks challenge was to take Made's Circle Skirt Tutorial and mix it up and make it your own.

I can't promise I'll do every weeks sew along but I did play along this week and this is what I came up with.


The Bubble Ruffle Tu-Tu for my baby ballerina!


Okay, I'm embarrassed to tell you {but I will anyway} that this is repurposed from and older lady style {ahem} "nightgown".  It just had so much beautiful {free}chiffon that I just couldn't pass up.

To make the bubble ruffles, I just kind of bunched up the fabric and sewed it on randomly until it achieved the look I was going for.

I love when my random experiments work out.  Maggie loves her new "bow-wa-weena dwess" so win or lose in the competition I'd say that makes it a WIN right there.

Here's one more look -


I'd love it if you'd join the fun and Sew Along with me next week too.  Everything's more fun with a friend!


P.S.  You can go HERE to see the other skirts in the Sew Along competition.  It's so fun to see how different everyone's interpretations are.  Lot's of great talent!

Tuesday, April 3, 2012

My Morgan Dress

I have a new dress to show you today! 

 And here's the best part you can make your own too!


About a week ago I was contacted by Jenilyn at Grits & Giggles to see if I would test out her Morgan Dress pattern.  Ummm... let me think... YES!

Here's what I came up with.


Maggie picked everything out (with just a teeny bit of prompting from mom).  I used a basic brown cotton with teeny tiny white polka dots.  The pattern is for the basic dress and it really allows for endless options fo embellishment so really one pattern can make for many different styles.  It's really versatile.

I decided to add embellishment by adding a white ruffle down the front and 3 big, bright, lime green buttons.  

I think I finally am able to describe my designing/sewing/purchasing style for Maggie as classic/vintage with a modern twist.  Like this dress which is that classic boutique dress that never goes out of style but with the ruffle and especially the color of the buttons it's on trend this season.  I've noticed this also with the colors and fit of Mags' Mod Mod Dress especially the Mod Mod styled with the neon tights and even with the New Glory His and Her's with last seasons trends at JCrew - big bows and pockets mixed with a classic nautical style.  Yeah, I think I'm officially declaring classic but trendy my style.


I really love this new dress and it was very simple to make.  It took about an hour to do even with having done French seams which takes longer (you don't have to do French seams with this dress).  I would say even the most beginner sewer can handle this dress.  I've since made another dress for a gift (which I desperately need to deliver - sorry Alice M.!  I promise soon!) and it was just as cute and easy to do.  I have a feeling I'll be making quite a few more in the future.


About the pattern:

It's a very professional pattern.  The instructions are clear and easy to follow and includes pictures of each step.  Size ranges are 6 months to 4T but Maggie is a 4T-5T and as you can see it fits great.  I can see her being able to wear this dress for many years as eventually a tunic as she grows.  It's very comfy and a nice cool dress for a hot Alabama summer (by the way it was 90 degrees out yesterday).

You can purchase the pattern HERE at her shop, but also make sure you check out her blog, Grits & Giggles too!


Hope you feel inspired to make something fun today!

Thanks for the opportunity Jenilyn!


Monday, March 12, 2012

Look Who We Met Today!!!

If you have a TV or have read a newspaper or just breathed American oxygen in the last year or so you probably know who this lady is standing along side the Cutts family.  That's right, just about two hours ago we met

Ann Romney!


What a fantastic lady!  It really was a pleasure.  In case you are wondering the man in the photo is not my husband John but is our cousin who is also named John.  John (our cousin) is on the National Campaign and it was so fun to see him and visit with him as he coordinated this event.  It was really neat to talk with him about what it's like to be on a campaign and working with the Romney's so closely.  They really are great people.

We met Mrs. Romney at a meet and greet in Birmingham.  The enthusiasm in the room was fun.  Mrs. Romney spoke for a little while about who her husband is.  She described him as someone who believes in being the best in the job you have and that he has consistently done that with every job he's had since she's known him.

The thing that related to me the most was when she told a story about how her boys used to be so naughty {Been there!}.  And she would be stressed out a lot {I hear that!}.  She said that Mitt said to her something along the lines of, "My job is important but yours is most important." {Awwww! and a great big Amen!}  As the only person in the room brave enough to bring a 4 year old AND a baby {Why am I insane?} who were very naughty all morning up until the event {Thank you Cheerios for your silencing effect on children} you can see where this warmed my heart a little.  So I promise to be the best in the job I have, raising these two little monsters.

She said more things that were great and campaign related and then we got to meet her, shake her hand, take pictures etc.  Really a great lady.


Maggie and our sweet friend Sam who volunteered at the event.  This wasn't the cheering type of event but afterward we did teach Maggie to hold the sign and chant "Romney, Romney" it was pretty cute with her teeny little voice.

We are sad we didn't get to go to the big Romney event last Friday but have you seen this cute picture all over the media in the last couple of days?  I've been seeing it everywhere.


Yeah.  That's totally our friends new baby!  I just had to share.  :) 


It sure has been a fun couple of days here in Alabama!


{If you're for Romney in the next election you can buy campaign buttons, bumper stickers and t-shirts online at Amazon.}


Tuesday, March 6, 2012

Oopsie

Whoops! I accidentally posted The Cuffed Dolman Tee tutorial before I added any words or explanation.  So if you saw it in Google reader and said. "Huh!?!  I want to know more." 


is the actual completed post.


Sorry 'bout that!


The Cuffed Dolman Tee

I've been wanting to make myself a Dolman Tee for a while now and when I saw THIS TUTORIAL from Make it and Love It I had no more excuses.  I have a million other projects to finish before I make myself a new shirt but since I spent 24 hours being puked on repeatedly by sick kids a new shirt was exactly what I needed to feel happy and clean and like a human being again.

So I jumped right into the tutorial and made the exact shirt that was on Make It and Love It except here's the thing - it turned out horrible!  It looked like a church choir robe.  But it's not the tutorials fault {the tutorial is fantastic}.  I blame myself mostly.  For one, I used a thicker knit fabric and it was a solid color.  Two, I've got some meat on me.  It just didn't have the same look as the cute example tee.  I think with a bigger girl the large flowy sleeves just add more bulk and it just wasn't making me love the shirt or myself.

But no worries, it was an easy fix!  The secret?  A simple cuff and a small tweak at the neck.  Here's a short run down on how to make one yourself.


Step 1:  Use this tutorial at Make It and Love It to make the body of your tee as well as the bottom band.

Step 2:  Using her same instructions for the waist band, make two cuffs for the arms.  Gather the sleeve and attach cuff.

Step 3:  Cut a much lower neckline than the tutorial instructions tell you to do.  (If you have a bigger chest a really high neckline will only make it seem bigger).  She has both front and back of the neckline the same.  I tried on the shirt and decided how low I wanted the neckline to be.  I then took a pencil and marked where I wanted it.  I then took off the shirt and trimmed the front collar using my marks as guides.

Step 4:  Instead of attaching a collar to the neckline like in the tutorial I simply folded the fabric over and used a double needle to stitch it in place.


Just two little tweaks and the shirt was now perfect for me.  It felt great to wear it and it was everything I am looking for in a shirt - cute, comfy and modest.

Thanks Ashley at Make It and Love It for the inspiration!


Saturday, March 3, 2012

Shaun the Sheep Cupcakes {tutorial}


Happy Baaaah-lated Leap Day!!

Leap Day is kind of a big deal around here.  HUGE in fact because this year Maggie got to celebrate her 1st birthday!  That's right, she's a Leap Day baby!


In February 2008 we were expecting her.  Her due date was at the beginning of the month but part way through my pregnancy they pushed her due date back two weeks.  Then something happened that I wasn't expecting she was 12 days late.  Not that's not a typo - TWELVE.  I felt like I was pregnant for 11 months. After about a week over due, the doctor wanted to schedule an induction.  I asked if we could do the 29th because heck I've waited this long might as well get the girl a cool birthday while I'm at it.  Well, I checked into the hospital the night before and they were going to induce me at 6 AM.  Turns out I didn't need an induction afterall because I went into labor that night.  It was meant to be!  A unique birthday for a very unique little girl.  She was the only one born in our hospital (which is a big one) that day.  So special!  

Since I get asked this a lot I'll tell you that we celebrate her birthday on non-leap years on February 28th.  Though I tend to get carried away and celebrate all week.  Also, we have so far not had any problems with her birthday being on Leap Day.  On non-leap years she still gets birthday rewards from stores and I've never had paper work or official document problems with it either.  It's just a super fun day to have a birthday!

Okay - now back to the cupcakes.

It's Shaun the Sheep!!!  


For those who don't know Shaun the Sheep is a clay-mation TV show by the same people that do Wallace & Grommit.  You can watch it on Netflix or buy it on Amazon.  It's actually a very funny cute show. 

Shaun the Sheep is Maggie's favorite everything.  This is her getting ready for bed wearing the Shaun hat her Nonie made for her (more on that one later) and holding the little Shaun from her G&G Cutts.  All while watching Shaun the Sheep on the DS.  At night she asks me to sing her the theme song before she goes to sleep.  Spoiled.


This year the only thing she asked for for her birthday was Shaun the Sheep cupcakes.  When your child who has problems with communicating with speech, never asks for anything, and has a birthday only every four years asks for Shaun the Sheep cupcakes you better get that girl Shaun the Sheep cupcakes!

Here's what I came up with.


Want to make your own?  They are a lot easier than they look.  I promise.


Supplies:

Cupcakes
White frosting
Mini-Marshmallows
Mini-chocolate chips
Wax or parchment paper
Piece of paper
Cookie Sheet
Sandwich bags or piping bags


 Step 1: 

Draw the shape of the Shaun head on a piece of paper.  I practiced a couple of times before I settled on one.


Step 2:

Melt about 1/4 to 1/3 cup of chocolate chips in a sandwich bag.  Place chips in bag and place in microwave for 20 seconds.  Take out and lightly squish the chips to mash/mix them.  Continue this process of heating for 20 second intervals until chocolate is melted.  Slice off a tiny corner of the baggie when done.


Step 3:

Place wax or parchment paper on top of drawing.  Pipe chocolate onto wax paper to fill in the shape.  Don't worry if it's lumpy.  The lumpy part is the back of Shaun's head.  You won't be seeing it.


Step 4:

Repeat as many times as you want and place Shaun heads on a baking sheet and place in the fridge or freezer to harden.


Step 5:

Once hardened, peel off the heads and flip them over.  Use the icing to create two dots for eyes.  Inside each white dot place an upside down mini chip for the dark center of the eye.  And you're done with your Shaun head!


Step 6:  

Frost your cupcake.

Step 7:

Cover cupcake in mini-marshmallows.

Step 8:

Use a dollop of frosting to attach the Shaun head to the cupcake body.


These sheep are so cute and so yummy.  The girls loved them but most importantly Maggie loved them.  The joy on her face was priceless.  So happy to make a little girls birthday wish come true!


{P.S.  You can find Season 1 and Season 2 of the show at Amazon.  Along with several short movies that we've never even knew existed.  Also, here is the Shaun the Sheep plushie that she got.}

Related Posts Plugin for WordPress, Blogger...